BenchCel Microplate Handler User Guide : Setting up BenchCel Microplate Handler : Creating profiles

Creating profiles
About this topic
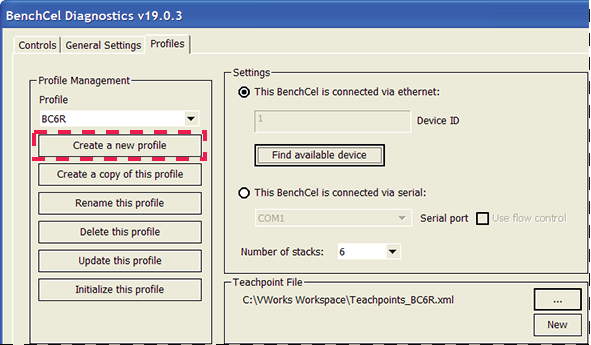
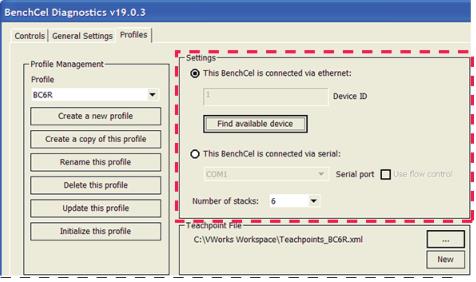
The computer configured by Agilent Technologies already has the correct profile to communicate with the BenchCel Microplate Handler. A new BenchCel profile is not required unless you want to set up unique communication settings or use a different teachpoint file.
If you are using a computer other than one configured by Agilent Technologies, you must create a BenchCel profile. This topic describes how to create new BenchCel profiles.
You must also create profiles for devices that are integrated with the BenchCel Microplate Handler. For instructions on how to create the profiles for other Agilent Technologies devices, see the corresponding device user documentation. For instructions on how to create profiles for a third-party device, see the applicable device driver user guide.
Profiles
IMPORTANT Each BenchCel Microplate Handler you install requires a unique profile, which enables unique communication settings.
A profile is a collection of settings, stored in the Microsoft Windows registry, that manages how you connect to devices. A BenchCel profile does the following:
Specifies the port used to establish communication between the BenchCel Microplate Handler and the controlling computer.
Specifies the number of stackers for the BenchCel Microplate Handler.
You use the BenchCel Diagnostics software to create and manage profiles.
Note: The profile is referenced by a device file. For information about device files, see Creating a BenchCel device in the VWorks software. For a detailed description of the relationships between the device file, profile, and teachpoint file, see the VWorks Automation Control User Guide.
Creating BenchCel profiles
 
Note: Unless you login to the VWorks software as an Administrator or Technician, only the Profile list and the Initialize this profile button are available in the Profile Management area of the Profiles page.
To create a BenchCel profile:
1
Open BenchCel Diagnostics.
2
On the Profiles page, click Create a new profile.
 
3
In the Create Profile dialog box, type a name, and click OK. Use a profile name that identifies the specific configuration, for example, use the device serial number.
4
In the Settings area, select one of the following:
Ethernet connection. Select This BenchCel is connected via ethernet, and proceed to step 5.
Serial connection. Select This BenchCel is connected via serial, and go to step 6.
 
5
Ethernet connection only. Click Find available device to select the device to associate with the profile. In the Discovered BioNet Devices dialog box that opens:
a
b
In the list of devices that appear, select the BenchCel device. If you have multiple BenchCel devices on the network, use the MAC Address to identify the BenchCel device you want. To successfully communicate with the BenchCel device, the Status column must display New or Matched for the device.
Note: To determine the MAC address, you can turn off all other BenchCel devices so that only one appears in the Discovered BioNet Devices dialog box.
c
 
6
a
b
Select Use flow control to stop the flow of data from the computer before it overruns the device communication buffer. This option helps to optimize communication over the serial connection.
 
7
If you want to create a profile for a BenchCel Microplate Handler that has a different number of stacks than the one connected to the controlling computer, set the Number of stacks value.
IMPORTANT During initialization, the software automatically detects the actual number of stacks on the BenchCel Microplate Handler. If this number differs from the number specified by the profile, an error message appears and gives you the option to Abort, Retry, or Ignore. If you click Ignore, the software overwrites the Number of stacks value with the actual number of stacks.
8
Note: The default teachpoint file name is Teachpoints_<profilename>.xml, where <profilename> is the name of the profile. The software saves the file in the C:\VWorks Workspace folder.
To use an existing teachpoint file or to change the automatically created teachpoint file name or storage location, click the corresponding button in the Teachpoint File area:
To select an existing teachpoint file. Click . In the Select a Teachpoint File dialog box, locate and select the teachpoint file that you want to use, and then click Open.
 
To change the teachpoint file name or storage location. Click . In the Save As dialog box, type a name for the teachpoint file, select the storage location, and then click Save. The file path appears in the Teachpoint File area. Later you will add teachpoints to this file.
9
Click Update this profile to save the changes.
10
To establish communication with the BenchCel Microplate Handler, click Initialize this profile.
 
If you are setting up the BenchCel Microplate Handler for the first time, return to Creating a BenchCel device in the VWorks software and select the profile name (step 5).
Related information
 
Adding a device in VWorks software