|
|
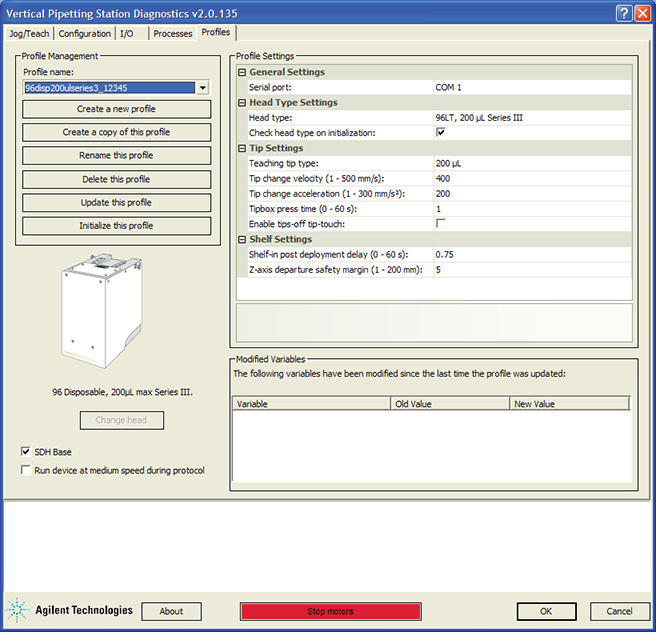
Creating Vertical Pipetting Station profilesVWorks software users with Administrator or Technician privileges (advanced users) can create and manage profiles for the Vertical Pipetting Station.