|
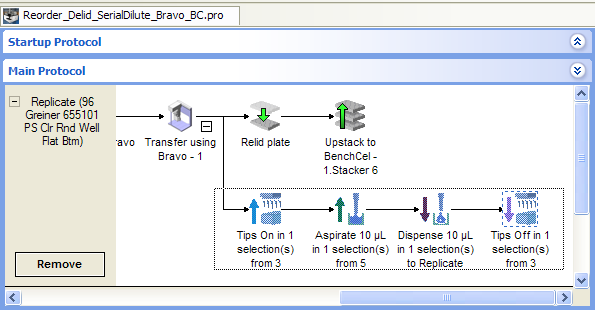
The procedures in this topic assume that a protocol task sequence that you want to replicate as a macro is already created. For details on how to set up tasks and create a protocol, see Workflow for creating a basic protocol.
2 Right-click the selection, and then choose Add to macro library from the shortcut menu. The Add to Macro Library dialog box opens.
3 Type a name for the macro, and click OK. A descriptive name can be more helpful for other macro users than a generic name. A version number is appended to the macro name, starting with version 1.
1 In the Available Macros tab, right-click the macro icon, and then choose Make a copy from the shortcut menu.
2 In the Create Macro Copy dialog box, type a new name for the copy, and click OK. The new macro icon appears in the Available Macros area.
1 In the protocol, right-click the macro icon, and then choose Save macro as from the shortcut menu.
2 In the Add to Macro Library dialog box, type a new name for the copy, and click OK. The new macro icon appears in the Available Macros area.
• Deleting a macro from the macro library. In this case, instances of the deleted macro can still remain in your protocols. However, the instances of the deleted macro no longer have version control or any association with other instances.
• Deleting an instance of a macro from a protocol. In this case, only the selected instance is deleted from the protocol. The macro remains in the macro library and in other protocols where it is used.Note: In a protocol where you no longer want a macro, yet you still want to retain a macro’s contents (task sequence), you can revert the macro. See Reverting an instance of a macro to an ungrouped task sequence.In the Available Macros area, right-click the macro icon, and then choose Delete from the shortcut menu. The macro icon disappears from the Available Macros list.In the protocol, right-click the macro icon, and then choose Delete from the shortcut menu. The macro icon and macro task contents disappear from the protocol.