For instructions on how to set up the Microplate Labeler (installing the device, adding the device in the
VWorks software, creating a profile for the device in diagnostics, and so on), see the
Microplate Barcode Labeler User Guide.
In Microplate Labeler Diagnostics, you specify the label format (label design). The format you specify includes the following:
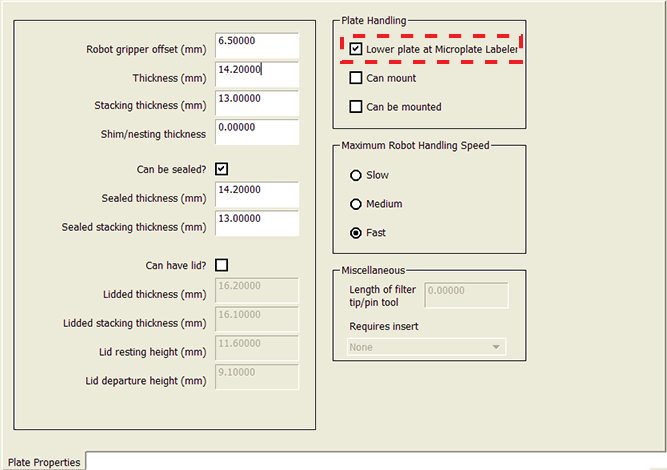
The Microplate Labeler plate stage has two vertical positions, top and bottom, which are used to accommodate two different sized microplates. By default, the system uses the top position during a protocol run. If the labware has a tall skirt (
1) or has a raised surface on the sides (
2), you can specify that the
Microplate Labeler use the bottom position (or lower the stage) during the run so that the label can be applied above the skirt or raised surface.
If you plan to use a barcode reader at the Microplate Labeler, you must specify the location of the barcode label on the labware so that the system will know which side to scan during the run.
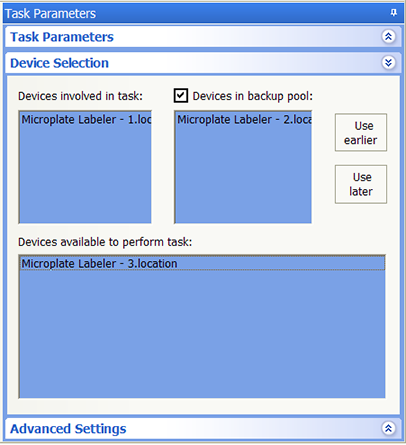
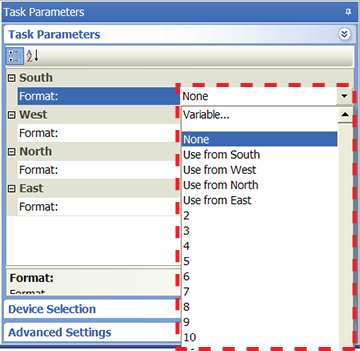
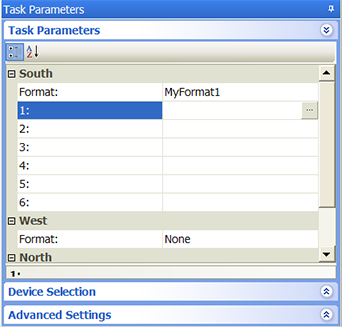
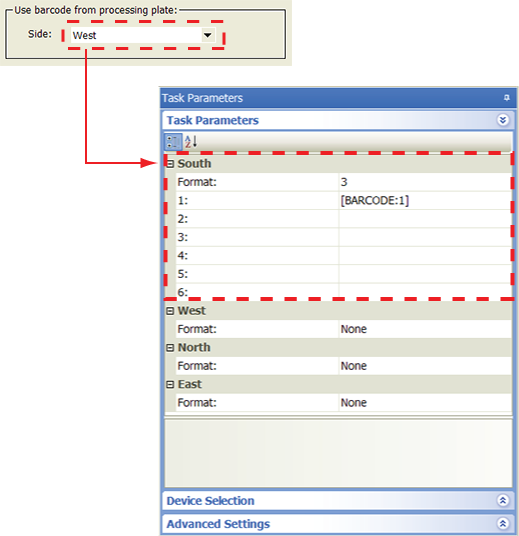
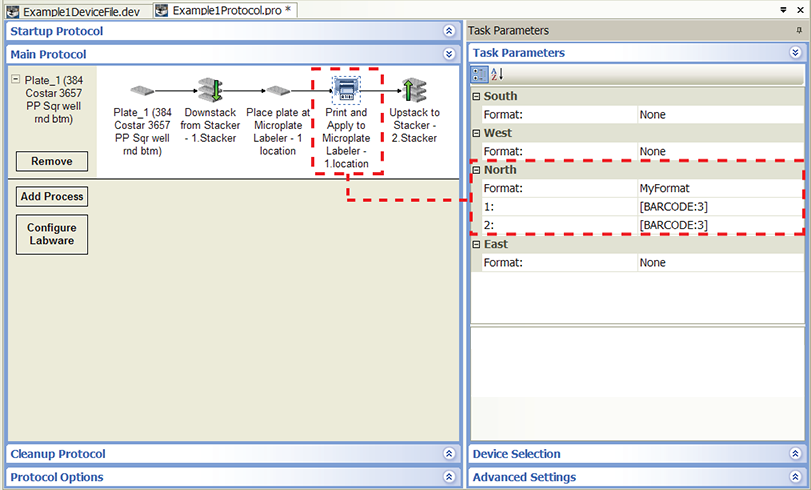
After selecting the device to use for the Print and Apply task, you can set the parameters in the Task Parameters area. The area lists the four sides of a microplate (south, west, north, and east). For each side, you can select a label format and specify the data that will substitute for the text and barcode fields in the label format.
|
|
|
|
|
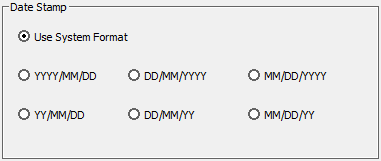
Click the icon in the Field Value area. In the Properties area, select the desired date format. YYYY is the year, MM is the month, and DD is the day.
|
|
|
Click the icon in the Field Value area. In the Properties area, select the desired data format: 12 hours (AM/PM) or 24 hours.
|
|
|
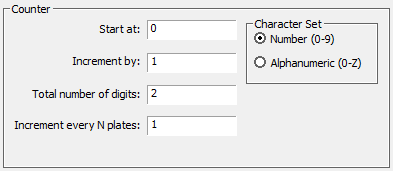
Click the icon in the Field Value area. Set the following in the Properties area:
|
•
|
Character Set. The option to use either numeric or alphanumeric characters.
|
|
|
|
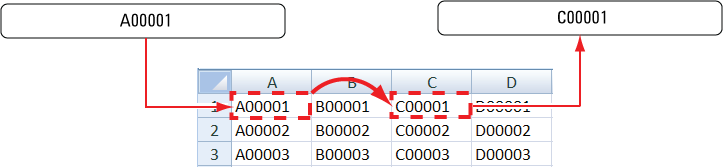
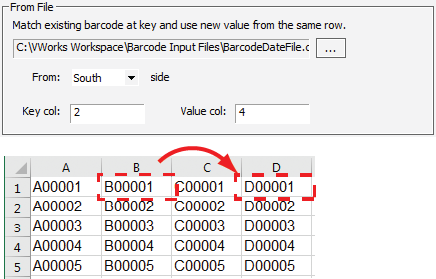
Click the icon in the Field Value area. In the Properties area, click the  button to select the barcode data file. In the From list, select the scanned side of the labware. Specify the column number that contains the lookup value (key) and the column number that contains the values you want to print.
Note: The plate parameters must specify Barcode or header South in the Barcode information area so the system knows to scan the south side of the incoming microplates.
|
|
|
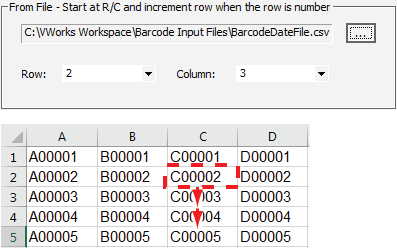
Click the icon in the Field Value area. In the Properties area, click the button to select the input file. Specify the row and column number of the starting value. During the run, the software automatically increments to the next row to print the next value.
|
|
|
Click the icon in the Field Value area. In the Properties area, type the text you want to print on every microplate.
|
|
|
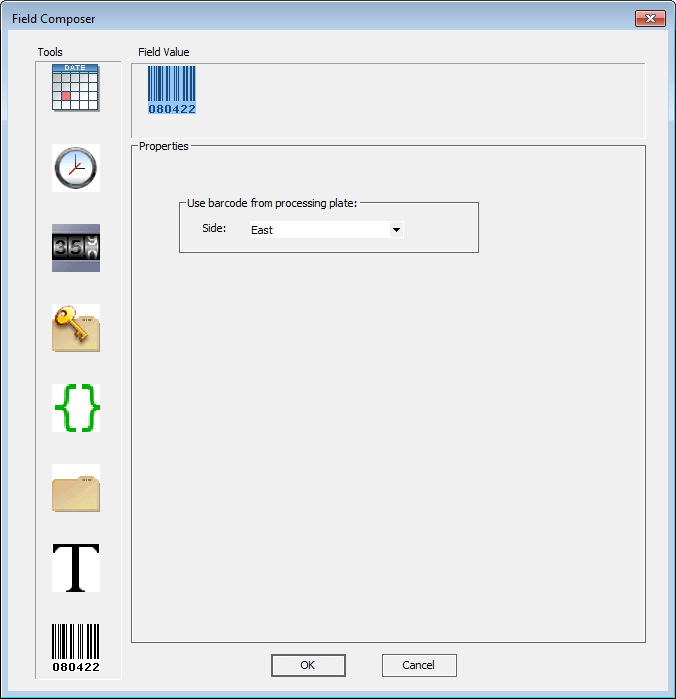
Click the icon in the Field Value area. In the Properties area, select the side (barcode) to be copied.
|
When you are finished, click OK. The information you specified appears in the Task Parameters area.
Note: This example assumes that the Microplate Labeler is set up correctly and the format, MyFormat, is already defined and loaded to the printer. MyFormat contains two fields. Field 1 is a human-readable text field. Field 2 is a barcode field. The device file and protocol are correctly created.
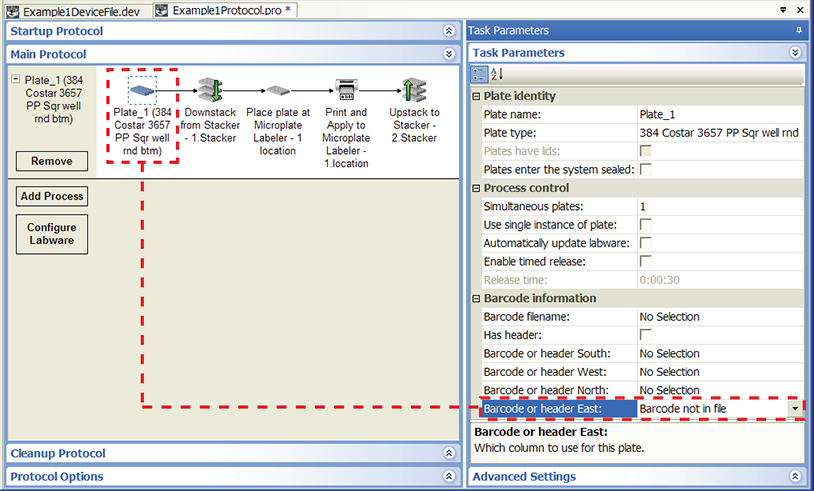
When setting the plate parameters, select Barcode or header East in the
Barcode information area so the system knows to scan the east side of the incoming microplates. No barcode verification file will be used, so select
Barcode not in file.
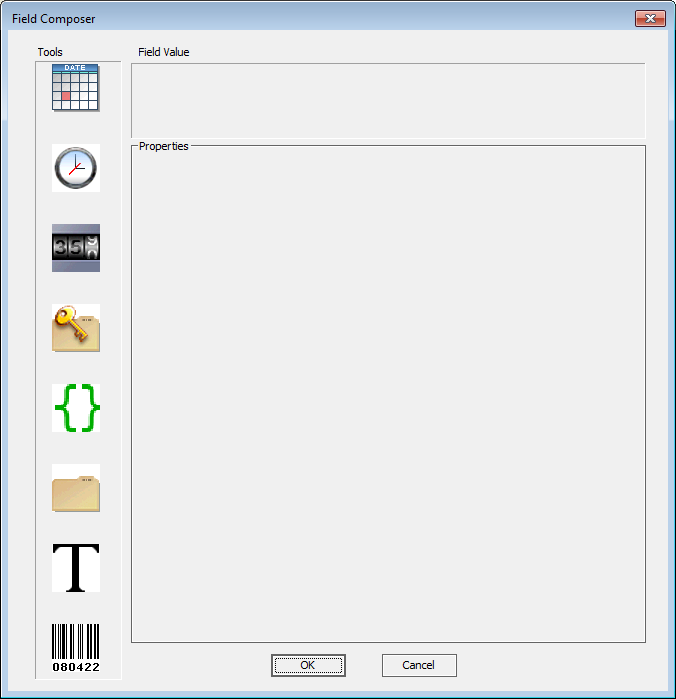
For each of the two format fields (1 and 2), open the Field Composer dialog box and double-click the barcode icon in the Tools area to add it to the Field Value area. Because you want to copy the barcode information from the east side of the microplate, select
East from the
Side list.
Note: This example assumes that the Microplate Labeler is set up correctly and the format, MyFormat, is already defined and loaded to the printer. MyFormat contains two fields. Field 1 is a human-readable text field. Field 2 is a barcode field. The barcode data file is stored in C:\VWorks Workspace\Barcode data files. The device file and protocol are correctly created.
When setting the plate parameters, select Barcode or header East in the
Barcode information area so the system knows to scan the east side of the incoming microplates. No barcode verification file will be used, so select
Barcode not in file.
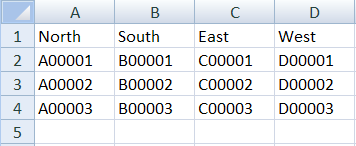
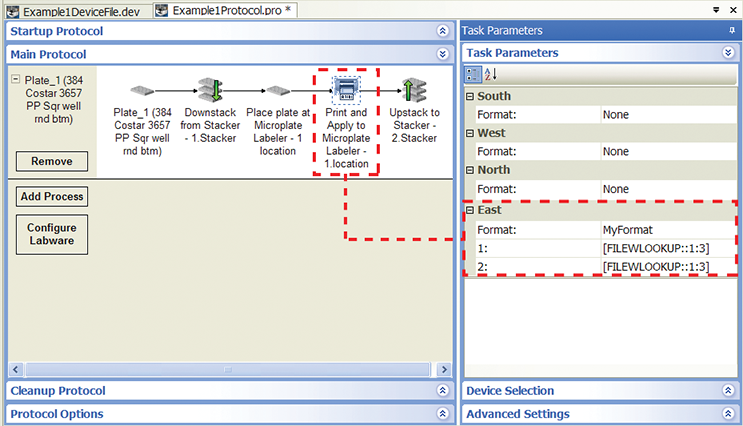
For each of the two format fields, open the Field Composer dialog box and double-click the key-file icon in the Tools area to add it to the Field Value area. In the
From File area, locate and select the data file to use. In the
From list, select the East side. In the
Key col box, type 1. In the
Value col box, type 3.
) allows you to: