|
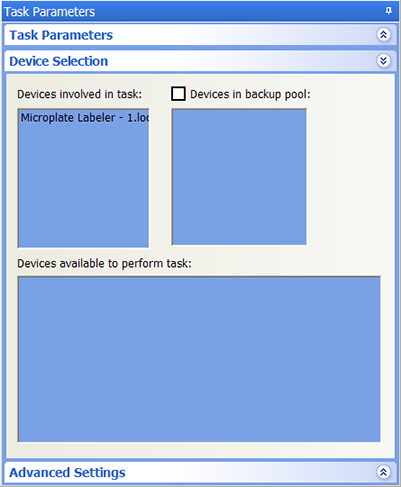
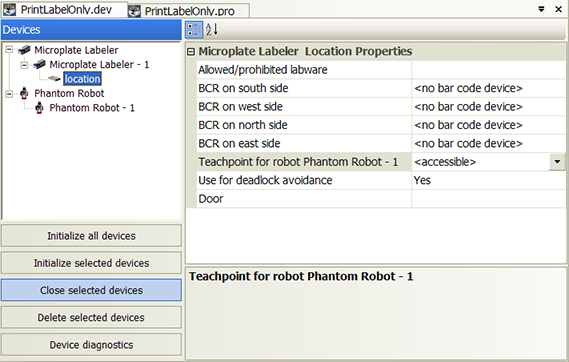
The Print task () prints barcode labels using the Microplate Labeler. The task does not apply labels to labware.
Microplate Labeler (standalone only) The requirements for the Print task is identical to the requirements for the Print and Apply task. See Print and Apply.You must select a device for the Print task before you can set the task parameters. After adding the Print task in the protocol, select the task, and then click Device Selection in the Task Parameters area.Double-click the desired device in the Devices available to perform task area to move it to the Devices involved in task area.
IMPORTANT Make sure the label formats are uploaded to the printer. Be sure to initialize the Microplate Labeler device before you set the task parameters.After selecting the device to use for the Print and Apply task, you can set the parameters in the Task Parameters area. The area lists the four sides of a microplate (south, west, north, and east). For each side, you can select a label format and specify the data that will substitute for the text and barcode fields in the label format.
1 Select the barcode format in the Format list:
Uses a format that was set up in Microplate Labeler Diagnostics.Note: If you do not see a list of formats, make sure the label formats are not empty (formats must contain at least one field), the formats are uploaded to the printer, and the Microplate Labeler device is initialized.
3 In the Tools area, double-click one or more of the following icons to specify the information to be printed on the barcode label. The selected icon appears in the Field Value area.IMPORTANT For field limitations, such as the maximum number of characters permitted or symbology-dependent limitations, check the format you set up in Microplate Labeler Diagnostics. See also the G5404B Microplate Labeler User Guide.
Click the icon in the Field Value area. In the Properties area, select the desired date format. YYYY is the year, MM is the month, and DD is the day. Click the icon in the Field Value area. In the Properties area, select the desired data format: 12 hours (AM/PM) or 24 hours.
• Character Set. The option to use either numeric or alphanumeric characters.
• Start at. The starting value.
• Increment by. The amount by which the value increments.
• Total number of digits. The total number of digits or characters, including leading 0s.
• Increment every N plates. The increment value. For example, 1 increments the value every microplate. Click the icon in the Field Value area. In the Properties area, click the
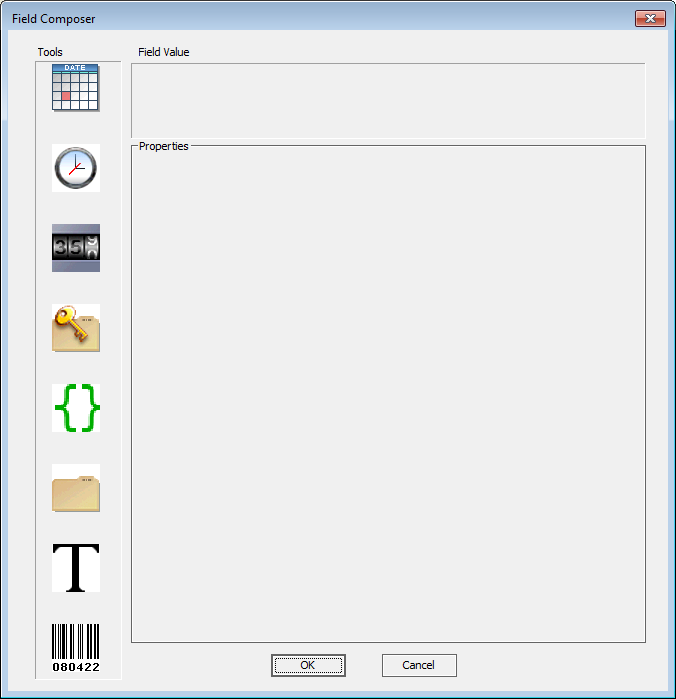
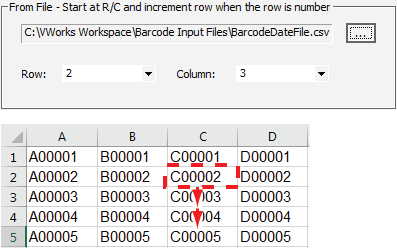
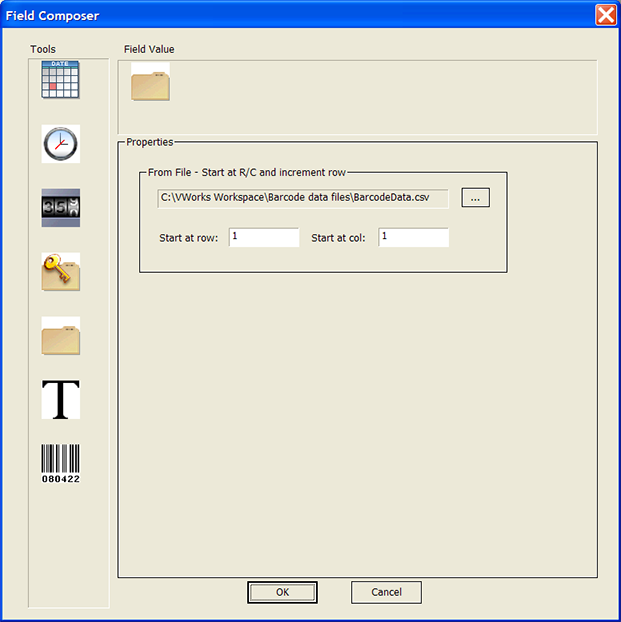
button to select the input file. Specify the row and column number of the starting value. During the run, the software automatically increments to the next row to print the next value.
Click the icon in the Field Value area. In the Properties area, type the text you want to print on every microplate.
4 When you are finished, click OK. The information you specified appears in the Task Parameters area.Using the Microplate Labeler, print values read from a barcode data file. The software should start reading the file from row 1 column 1.Note: This example assumes that the Microplate Labeler is set up correctly and the format, MyFormat, is already defined and loaded to the printer. MyFormat contains two fields. Field 1 is a human-readable text field. Field 2 is a barcode field.Create a device file that contains both the Microplate Labeler and a Phantom Robot, as shown. In the Microplate Labeler Location Properties area, make sure the Teachpoint for Phantom Robot is <accessible>.
For each of the two format fields (1 and 2), open the Field Composer dialog box and double-click the data file icon in the Tools area to add it to the Field Value area. In the Properties area, locate and select the data file. In the Start at row box, type 1. In the Start at col box, type 1.