Bravo Platform User Guide : Maintenance and troubleshooting : Changing the Bravo head

Changing the Bravo head
About this topic
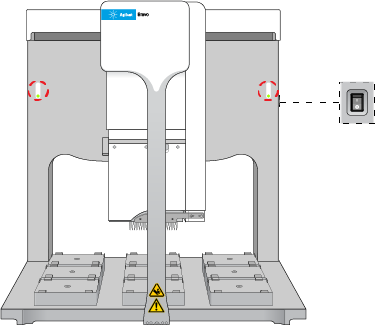
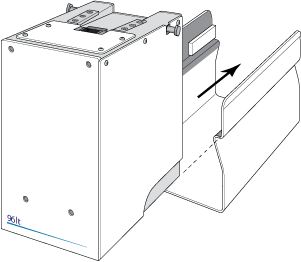
This topic describes how to uninstall and install a liquid-handling head, other than the Bravo 96AM Head, and how to adjust the corresponding settings in the VWorks software.
 
*AssayMAP Bravo Platform only. To prevent potential injury from exposure to chemical spills, ensure that you empty the syringes before uninstalling the Bravo 96AM Head. For instructions, see the AssayMAP Bravo Platform Getting Started Guide.
 
Before you start
 
*Put on gloves to protect your hands from potential exposure to any residual contaminants.
 
 
*Always turn off the Bravo Platform before installing or uninstalling a liquid-handling head. Failure to do so can damage the head electronics.
 
 
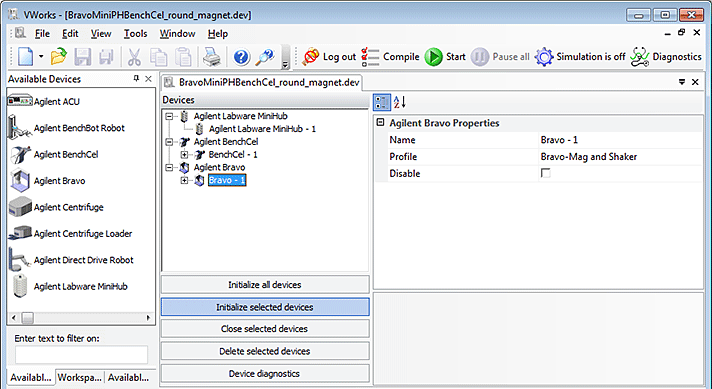
*If a head is being used for the first time, make sure you have a profile specifically for that head. If necessary, create a new profile before starting the following procedure. For details, see Creating and managing profiles.
 
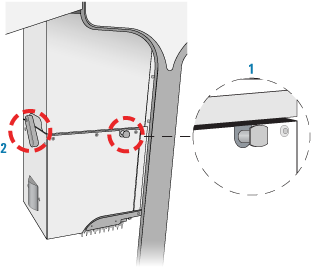
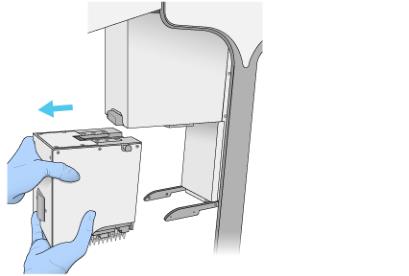
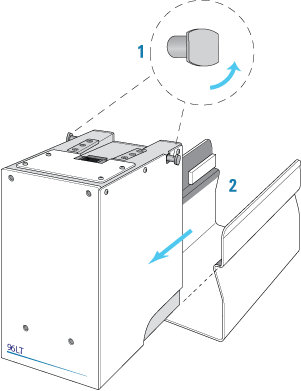
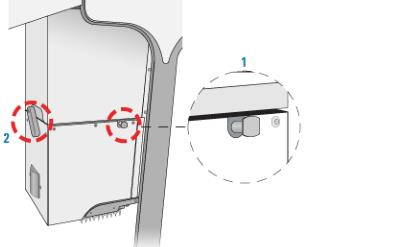
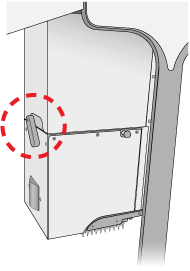
If disposable tips are loaded on the currently installed head, use Diagnostics to dispense any liquid and remove the tips before removing the head. For instructions, see Performing a task using Bravo Diagnostics.
Make sure that the head mount is in its home position above deck location 5. If necessary, click the Jog/Teach tab in Diagnostics, and then click Home XYZ to reposition the head mount.
 
*If you are changing the currently installed head for the same type of head and want to edit the profile, you may use the Change head wizard. Otherwise, use the following procedure.
 
Uninstalling the liquid-handling head
 
 
To uninstall the liquid-handling head:
1
Ensure that the Bravo Platform is turned off. Check that the power switch located on the right side is set to off (o) and the status lights on the device front are not lit.
Figure. Bravo status lights (front) and power switch (right side)
 
2
If necessary, manually move the head to the center of the deck.
3
a
Pull out and twist the (1) two head-retainer pins one-quarter turn (90°) so that they remain retracted.
Note: The straight edge of the retainer pins should be horizontal.
b
Turn the (2) head lock counterclockwise until it clicks into position.
Figure. Installed Bravo head: (1) retainer pin and (2) head lock
 
4
Reaching from the left side of the Bravo tie bar, grasp the head firmly as the following figure shows:
a
b
 
5
 
*Support the head securely without touching the barrels, probes, or pins. Dropping the head or bumping the barrels, probes, or pins will damage the head.
 
6
Disposable-tip heads. Rest the bottom of the stand on a clean, dry surface. Slide the head into the stand, with the barrels facing down, as the following figure shows.
Figure. Series III disposable-tip head and storage stand
 
 
Pin Tools. Rest the top of the head on a clean, dry surface with the pins facing up. Slide the stand onto the head
Store the head top-side up and resting in the head stand.
 
 
Installing the liquid-handling head
 
 
To install a Bravo liquid-handling head:
1
Make sure that the Bravo Platform is turned off and that the Bravo head mount is in its home position, which is centered above deck location 5.
Note: If the device is off, you can use your hands to move the head mount gently into position.
Figure. Bravo deck locations (top view)
 
2
 
*Do not rest the bottom of a liquid-handling head on any surface. Doing so can damage the barrels, pins, or probes.
 
 
*To prevent potential contamination, do not touch the liquid-handling head barrels, tips, or probes with your hands.
 
3
Disposable-tip heads. Rest the bottom of the stand on a clean, dry surface. Slide the head out of the stand as the following figure shows, so that the barrels are facing down.
 
Pin Tools. Ensure that the top of the head is resting on a clean, stable surface so that the pins are facing up. Slide the stand off of the head.
4
5
While supporting the head with your hands, slide the head onto the Bravo head mount. Press the head firmly into place to ensure the head is plugged into the connector receptacle on the head mount. You should hear the click when the retaining pins snap into place.
Figure. Installing a head in the Bravo head mount
 
Note: If you do not hear the pins snap into place, check that the straight edges of the retainer pins are in the vertical position, as the following figure shows. Attempt to rotate the pins to ensure that they are in the locked position. The pins should not rotate freely.
Figure. Installed head: (1) retainer pin and (2) head lock
 
 
6


*Dropping the head or bumping the barrels or probes will damage the head. If the Bravo head is not properly secured in place, it could drop unexpectedly. Ensure that the head is securely locked into the head mount.


Adjusting VWorks settings
After installing a different Bravo head type, you must ensure that the Bravo device in the VWorks software is linked to the correct profile.
To adjust the VWorks settings for a different Bravo head:
1
In the VWorks window, ensure the correct device file is open for this Bravo device, and then ensure that the profile selected under Bravo Properties is correct.
 
*If this is the first time to use this Bravo head with this device, you must create a profile for the new Bravo head.
 
2
On the side of the Bravo Platform, press the power switch to the on (I) position.
3
To initialize the Bravo Platform, click Initialize selected devices in the device file.
 
4
Open Diagnostics, and in the Jog/Teach tab, make sure that a value is displayed for each axis.
This confirms communication between the Bravo Platform and VWorks software.
5
If you opened an existing device file in step 1, go to the Configuration tab in Diagnostics and verify that the location configuration graphic matches what you actually have on the Bravo deck.
Related information
 
Tips Off task in Bravo Diagnostics
Initializing the Bravo Platform
Homing the Bravo head
Available Bravo heads