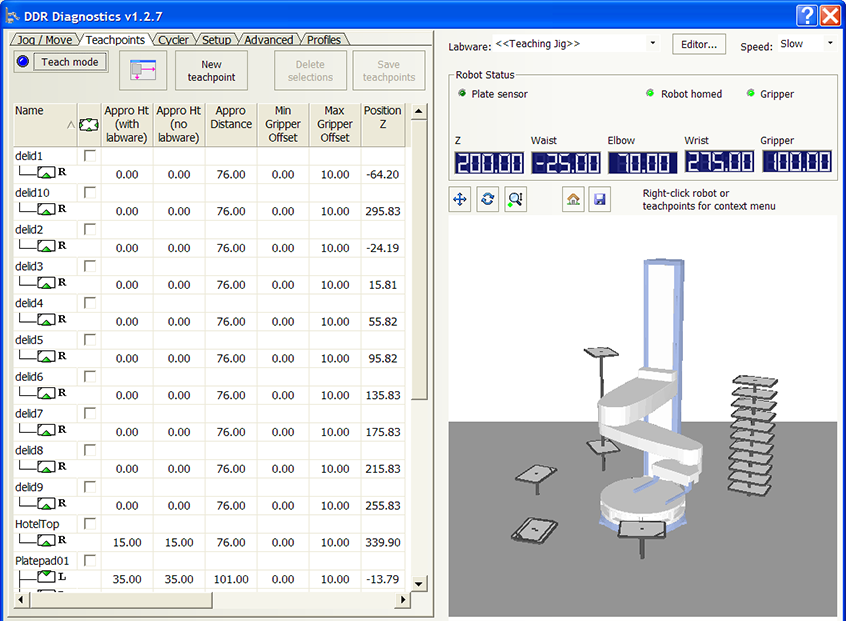
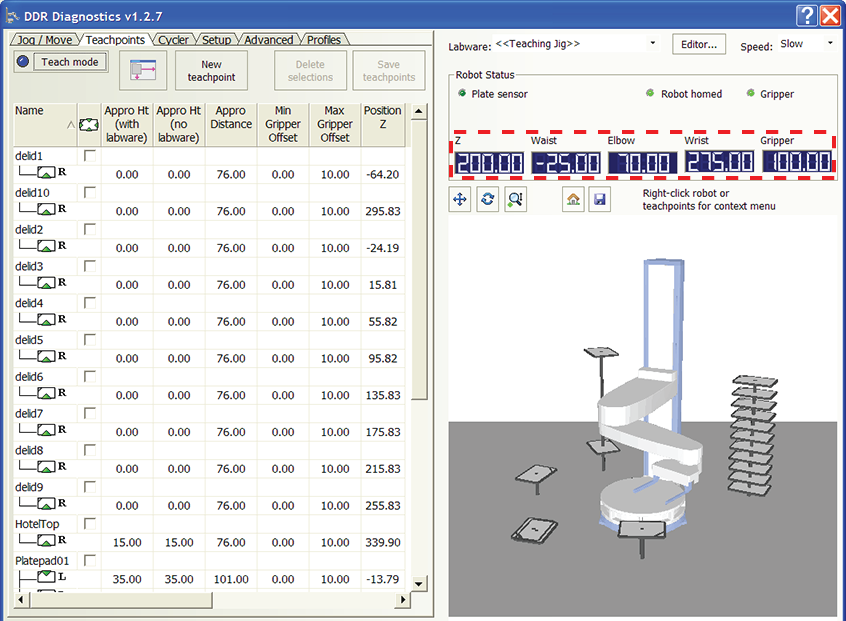
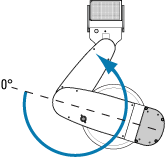
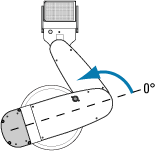
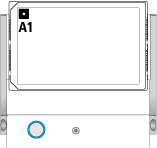
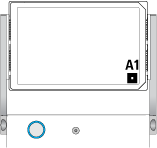
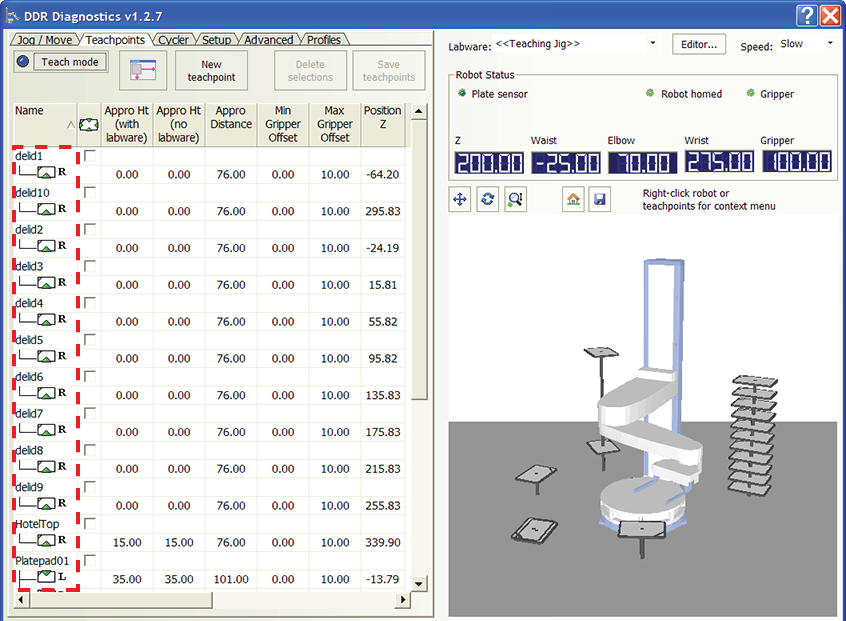
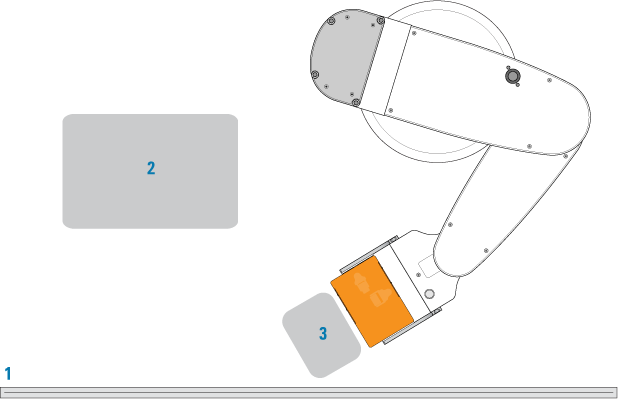
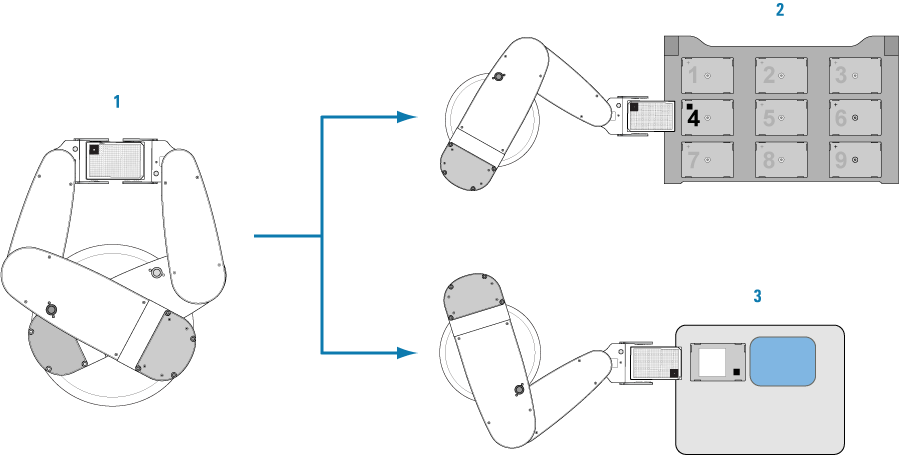
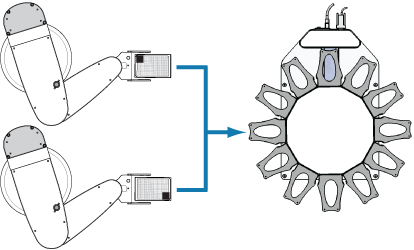
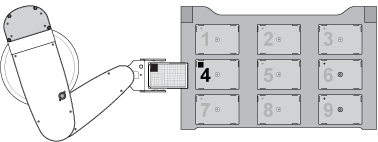
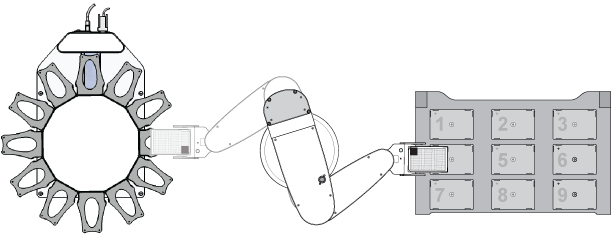
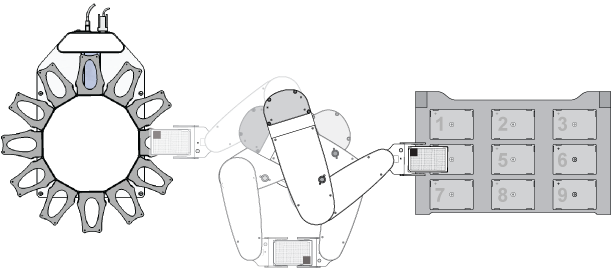
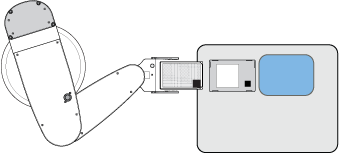
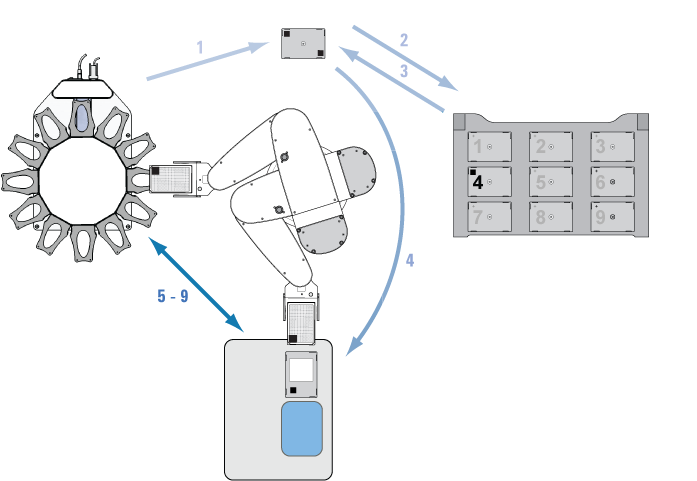
Direct Drive Robot User Guide : Setting teachpoints : Planning Direct Drive Robot teachpoints

Planning Direct Drive Robot teachpoints
About this topic
The Direct Drive Robot is able to hold labware in both the landscape and portrait orientations. In addition, the A1 well can be away or toward the robot grippers in either labware orientation.
The orientation flexibility permits multiple options at each teachpoint. Carefully planned teachpoints can optimize results and throughput. This topic presents the following:
Direct Drive Robot teachpoints
A Direct Drive Robot teachpoint consists of the following:
Parameters that define robot movements near and at the teachpoint
You set and edit teachpoints in the DDR Diagnostics Teachpoints tab.
 
Orientation coordinates
A teachpoint is defined by a set of coordinates that define where the robot picks up or places labware. The teachpoint can be on an integrated device or a platepad. Teachpoints are relative to the robot home position. You can view the teachpoint or robot coordinates in the Teachpoints tab in DDR Diagnostics.
 
Orientation information
Each teachpoint contains the following orientation information:
 
Away from the robot grippers in either labware orientation
The orientation information is displayed in the Teachpoints tab in DDR Diagnostics.
 
Parameters that define robot movements
A number of parameters define the robot movements near or at a teachpoint:
For more information, see Creating a new teachpoint.
Guidelines for setting teachpoints
Before setting teachpoints, determine the best orientations for each location. In addition, be aware of how varying robot and labware orientations between teachpoints can affect robot speed and efficiency.
Orientations to consider
Before you set a teachpoint, take into consideration all of the following:
Robot-arm orientation. Determine the best robot-arm orientation (left or right) for the location. The accessibility of a location can determine the robot-arm orientation. See Examples.
Labware orientation. Determine the best labware orientation (landscape or portrait) for the location. The orientation might be determined by device requirements. For example, the Labware Stacker requires labware to be in the landscape orientation, but the portrait Plate Hub Carousel requires labware to be in the portrait orientation.
A1-well orientation. Determine the A1-well orientation of the labware. In general, for devices that require the landscape orientation, such as the Labware Stacker and the landscape Plate Hub Carousel, the optimal A1-well orientation is typically away from the grippers. For storage devices that require the portrait orientation, the optimal A1-well orientation depends on the requirements at other teachpoints in the system. See Examples.
For a description of the orientations, see Orientation information.
Factors that affect robot speed and efficiency
To increase robot speed and efficiency, you should:
Maximize the robot’s ability to plan optimal paths. Wherever possible, set a teachpoint with as many orientations as possible so that the robot can determine the optimal path during the run. For example, set a teachpoint with both the right- and left-arm orientations.
Minimize the number of regrips between teachpoints. A regrip is required if, for example, the robot is transferring a labware from one location that requires one labware orientation to another location that requires a different labware orientation. To minimize the time required for regripping, wherever possible, set a teachpoint with multiple orientations and allow the robot to determine the optimal path during the run. Alternatively, consistently set teachpoints using one orientation wherever possible. For more information about regrip stations, see Designating a teachpoint as a regrip station.
Maximize the gripper offset ranges. A regrip station is also used if the robot needs to adjust gripping height as it transfers a labware from one location that requires a gripper height that is different from the next location. To provide the system with the greatest flexibility for identifying a grip position that works for all locations, you should set the widest possible range for each gripper offset parameter. For more information about gripper offset ranges, see Setting the gripper offset parameters.
Set Approach Distance at the smallest possible value. In general, rotating robot movements are faster than straight movements. To ensure that the robot rotates from the safe zone directly to the teachpoint approach height, set the Approach Distance at 0. If obstacles near or at the teachpoint does not permit the rotating movement, set the Approach Distance at the smallest possible value for the location. For more information, see Setting the approach distance.
Examples
Example 1: Robot-arm orientation
In the following example, the system window (1) and an adjacent device (2) are two obstacles near the desired location (3). Therefore, the left-arm orientation should be used when setting the teachpoint.
 
Example 2: Robot-arm and A1-well orientation
In the following example, there are no obstacles near the platepad in the portrait orientation. You can set the platepad teachpoint with the left- (1) and right-arm (2) orientations.
 
The position of the A1 well is device dependent. So the arm orientation the robot uses at this platepad is determined by the A1-well orientation at the next teachpoint.
In the following example, the labware is placed at the platepad with the A1 well positioned as shown (1). If the next device requires the A1 well to be toward the grippers (2), the robot will use the left-arm orientation. However, if the next device requires the A1 well to be away from the grippers (3), the robot will use the right-arm orientation.
 
Example 3: Plate Hub Carousel - Bravo deck location 4 - Plate Hub Carousel
A protocol requires labware to be moved from a portrait Plate Hub Carousel slot to the Bravo Platform for liquid-handling tasks. After processing, the labware must be moved from the Bravo Platform and returned to the portrait Plate Hub Carousel slot.
The labware orientation option or requirement at each device is as follows:
 
Portrait Plate Hub Carousel (top view):
Bravo Platform (top view):
Note: In the example setup, the robot can only approach the Bravo deck as shown.
The optimal teachpoint setup at the Plate Hub Carousel would require the least number of regrips as the labware is transferred between the two devices.
If the Plate Hub Carousel teachpoint is set with the A1-toward orientation, the robot can transfer the labware from the Plate Hub Carousel to the Bravo Platform without regripping. Therefore, the A1-toward orientation at the Plate Hub Carousel is the optimal setup.
 
If the Plate Hub Carousel teachpoint is set with the A1-away orientation, the robot must regrip the labware during the transfer. Therefore, the A1-away orientation at the Plate Hub Carousel is not the optimal setup.
 
Example 4: Repeating tasks and regrip frequency
A protocol requires labware to be moved from a portrait Plate Hub Carousel slot to the Bravo Platform for liquid-handling tasks. After processing, the labware must be moved from the Bravo Platform to a dispenser. Subsequent protocol tasks move the labware multiple times between the dispenser and the Plate Hub Carousel for cycles of dispensing and incubation.
The labware orientation option or requirement at each device is as follows:
 
Portrait Plate Hub Carousel (top view):
Bravo Platform (top view):
Note: In the example setup, the robot can only approach the Bravo deck and the dispenser as shown.
The optimal teachpoint setup at the Plate Hub Carousel would require the least number of regrips as the labware is transferred between the three devices.
If the Plate Hub Carousel teachpoint is set with the A1-away orientation, the robot must regrip as it moves labware from the Plate Hub Carousel to the Bravo deck (1, 2), and regrip again as it moves the labware from the Bravo deck to the dispenser (3, 4). Thereafter, the robot can move the labware between the dispenser and Plate Hub Carousel without regripping (5–9). So the total number of regrips in this scenario is two.
Note: In general, to minimize the number of regrips, consider matching the orientations of consecutive teachpoints in repeating protocol tasks.
 
If the Plate Hub Carousel teachpoint is set with the A1-toward orientation, the robot can move labware from the Plate Hub Carousel to the Bravo deck without regripping. However, the robot must regrip as it moves labware from the Bravo deck to the dispenser, and then multiple times as it moves labware between the dispenser and Plate Hub Carousel in cycles of dispensing and incubation. The total number of regrips is greater than two. Therefore, the A1-toward orientation at the Plate Hub Carousel is not the optimal setup.
Related information