Installing and setting up a MySQL ODBC
Before you start
This topic describes how to install and set up a data source in MySQL ODBC (open database connectivity) for the VWorks Inventory database.
Note: If the computer was provided by Agilent Technologies, the Inventory database may be set up already. In this case, see Connecting to the Inventory database.
During the MySQL ODBC connection setup you will:
• Import the VWorks database schema into MySQL. This sets up the database table structures for use by the VWorks Inventory Editor.
• Create, define, and configure a new ODBC data source so that MySQL can access data in the Inventory database.
Importing the database schema
To import the database schema:
1 Copy the following database schema file:
vworks_mysql_8.0.sql
Note: This file is installed with the VWorks software in the folder:
C:\\Program Files (x86)\Agilent Technologies\VWorks\Schema\
C:\\Program Files (x86)\Agilent Technologies\VWorks\Schema\
Paste the copy into the following folder:
C:\\Program Files\MySQL\MySQL Server 8.0\bin\
 |
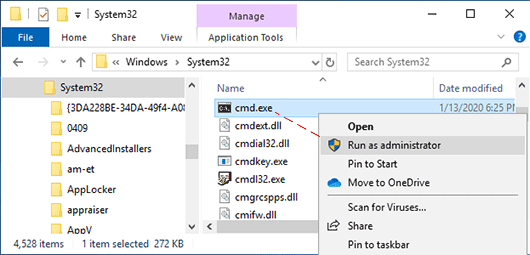
2 Open a Command Prompt window, as follows:
a In the C:\Windows\System32 folder, right-click cmd.exe, and then select Run as administrator.
b Click Yes in the User Account Control dialog box that opens.
 |
3 Execute the following lines in the Command Prompt window:
cd c:\program files\mysql\mysql server 8.0\bin <enter>
mysql -u root -p < vworks_mysql_8.0.sql <enter>
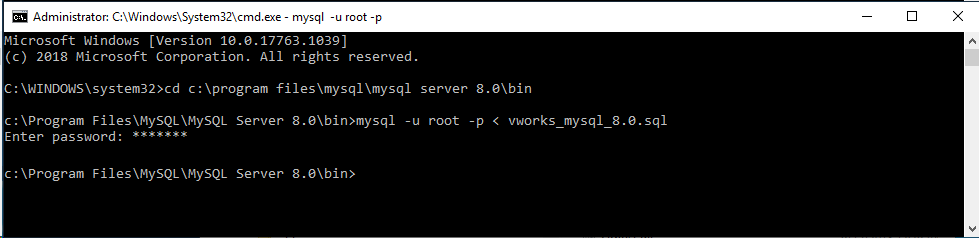 |
When prompted for password, enter agilent.
Make sure no errors occur while executing this command.
Creating ODBC connections
To create ODBC connections:
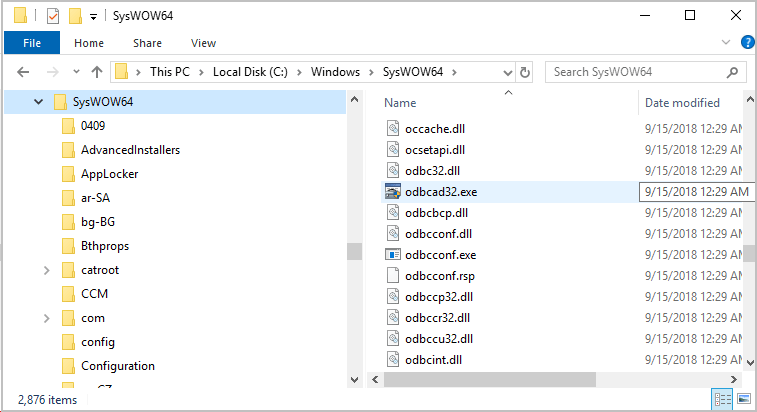
1 Open the ODBC Data Source Administrator to create ODBC connections, as follows:
In the C:\Windows\SysWOW64 folder, right-click odbcad32.exe, and then select Run as administrator. The ODBC Data Source Administrator (64-bit) dialog box opens.
 |
2 In the ODBC Data Source Administrator dialog box:
a Remove any previously defined MySQL ODBC Driver Sources as follows:
• Click the User DSN tab, select any predefined MySQL ODBC Driver Sources named velocity11, and click Remove.
• Click the System DSN tab, select any predefined MySQL ODBC Driver Sources named velocity11, and click Remove.
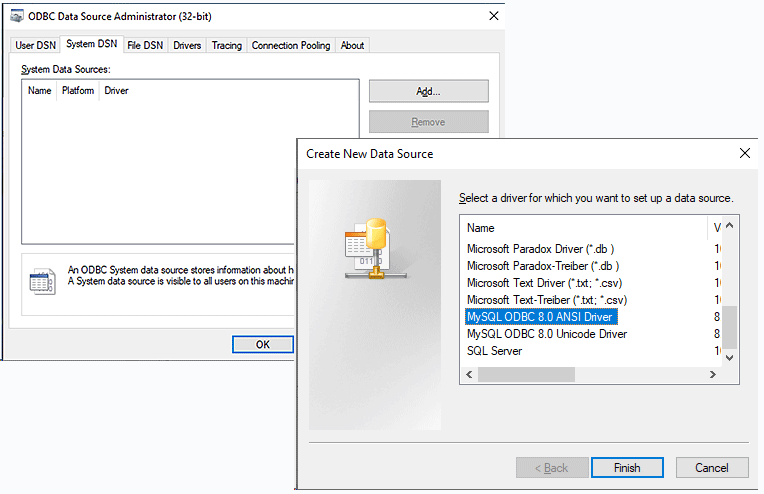
b In the System DSN tab, click Add to create a new data source.
c In the Create New Data Source dialog box, select MySQL ODBC 8.0 ANSI Driver, and then click Finish.
 |
3 In the MySQL Connector/ODBC Data Source Configuration dialog box that opens, define your data source as follows:
4 For the VWorks Inventory database, set the following parameters:
Note: You do not have to provide a port number. Use the default number displayed.
Settings for VWorks Inventory database | |
|---|---|
Connection Parameters | Settings |
Data Source Name | VWorksInventory |
Description | (optional) VWorks Inventory database |
TCP/IP Server | localhost |
User | vworks |
Password | vworks |
Database | velocity11 |
a Click Details to expand the dialog box.
b In the Connection tab, select the Enable automatic reconnect check box.
c In the Cursors/Results tab, select the Return matched rows instead of affected rows check box.
5 Click Test. When the Connection Successful message appears, click OK.
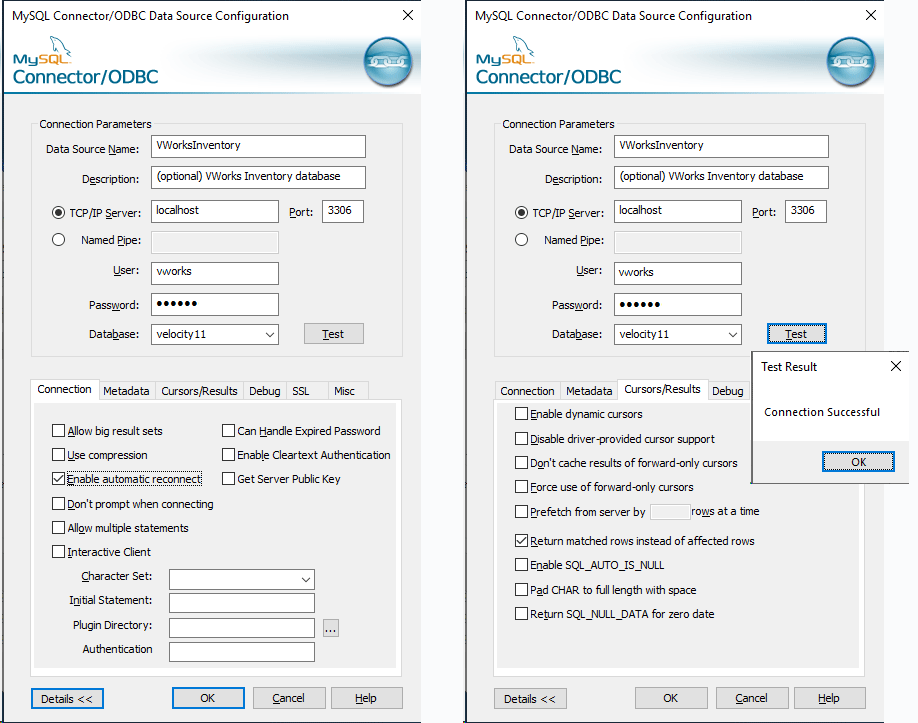 |
6 In the Connection Parameters area, clear the User and Password fields, as the following figure shows, and then click OK to close the Connector/ODBC dialog box.
Note: The VWorks software will specify the user name and password, so, you must clear the User and Password fields after testing the connection.
7 In the System DSN tab, verify that the VWorksInventory data source appears.
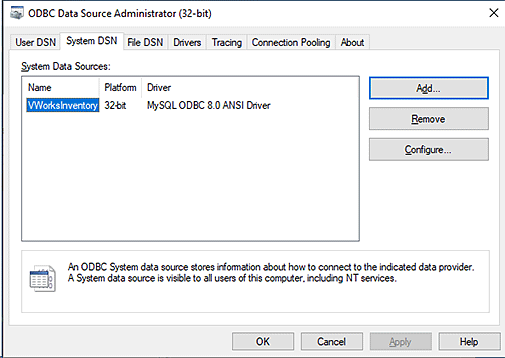 |
If you are finished configuring data sources, click OK to close the dialog box.
To establish a database connection in the VWorks software, see Connecting to the Inventory database.
Related information
For information about... | See... |
|---|---|
Connecting to the Inventory database | |
VWorks Inventory Editor |