Setting up a Trash or Filter Plate Holder accessory
About this topic
This topic describes how to set up a deck location as one of the following:
• Trash position for disposal of pipette tips
Note: If you are discarding lids to trash, see Configuring a platepad for delidding.
• Filter Plate Holder for use with the Vacuum Filtration Station
You can use this accessory as the filter plate location during the Vacuum Assemble, Move and Filter Plate, and Vacuum Disassemble tasks in the VWorks protocol.
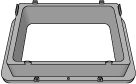
The following figure shows the Tip Trash Bin accessory, which can also be used as a Filter Plate Holder.
Figure Agilent Tip Trash Bin or Filter Plate Holder accessory
 |
Before you start
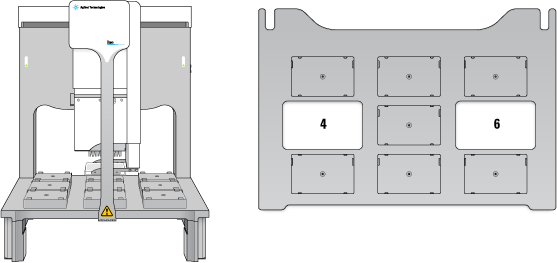
The accessory can be installed at Bravo deck locations 4 and 6, which have cutouts for through-deck access.
Figure Bravo Platform on deck risers and top view of deck location cutouts
 |
The hardware setup requirements vary depending on how the accessory is to be used.
• Tip Trash Bin. In this case, deck risers (146 mm) are required to provide the extra height for trash collection below the deck in a trash receptacle (customer-supplied). In addition, a cutout may be required in the table below this deck location. For installation details, contact Agilent Technical Support.
• Filter Plate Holder. If the accessory is used as a location for placing labware, the Bravo Platform does not require deck risers. The cutout in the center of the accessory is sufficient to provide the extra space for the filter plate wells to protrude beyond the bottom edges of the filter plate skirt.
Use the following procedure to install the accessory.
Installing the Filter Plate Holder accessory
Ensure that you have the following:
• Wrenches
Depending on the instrument, M2 and M4 hex wrenches or T10 and T30 wrenches are required.
• Filter Plate Holder accessory
To install the Filter Plate Holder accessory:
1 Uninstall the platepad, if applicable, from Bravo deck location 4 or 6.
To uninstall a platepad, remove the M6 flathead screw from the center of the platepad. Remove the platepad.
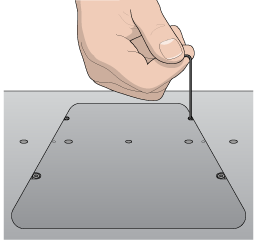
2 Remove the four M3 screws that attach the cutout cover to the deck. Lift the cutout cover out of the deck.
Figure Side view of cutout cover on the Bravo deck
 |
3 Position the Filter Plate Holder in the cutout, aligning the two dowel pins in the holes.
4 Install the four M3 screws that secure the Filter Plate Holder to the deck.
Figure Filter Plate Holder front view
 |
Configuring the Filter Plate Holder in the software
To configure the Filter Plate Holder:
1 In Bravo Diagnostics, click the Profiles tab, and verify that the correct profile is initialized.
2 Click the Configuration tab.
3 In the Locations list, select the deck location of the installed accessory.
4 In the Location is configured as list, select Accessory. The Accessories Wizard appears.
5 In the Location list, confirm the deck location of the accessory, and then click Next.
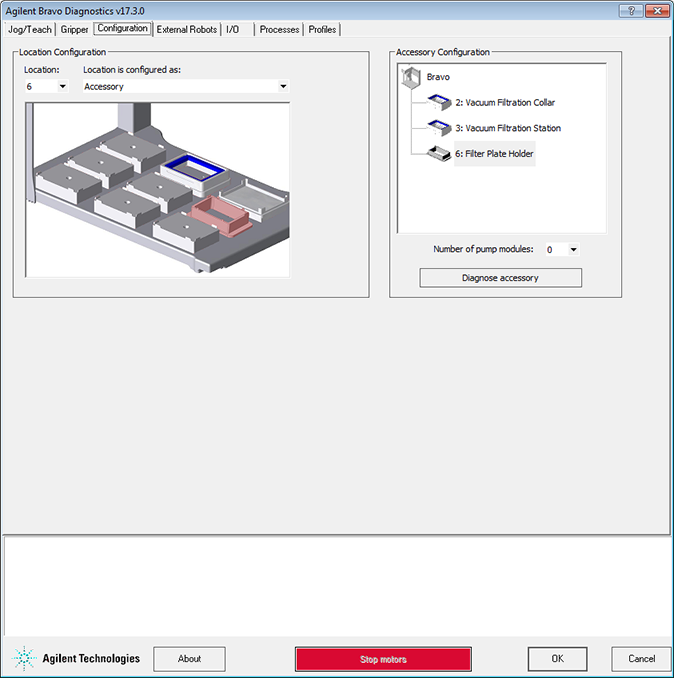
6 In the Accessory list, select Filter Plate Holder, and then click Next.
7 Click Finish.
8 When a message appears and asks whether to move the teachpoint to a safe Z height, do one of the following:
• Click No if you verified the accuracy of the platepad teachpoint before installing and configuring the accessory, no further adjustment to the teachpoint should be required.
• Click Yes if you plan to reteach this location.
 |
The image of the accessory appears at the specified deck location in the Configuration tab, as the following figure shows.
Figure Filter Plate Holder in the Configuration tab
 |
9 In the Profiles tab, click Update this profile.
10 VWorks Plus only. If an audit trail is being logged, the Audit Comment dialog box opens. Select or type the audit comment, and then click OK.
When authoring protocols in the VWorks software, use the Place Plate task in the Bravo Subprocess to move filter plates or other microplates to this Bravo accessory location. You may specify which Labware Class is allowed at this location. For example, you might want to allow only filter plates at this location. For more details on Labware Classes, see the VWorks Automation Control Setup Guide. For more details on how to create a protocol, see the VWorks Automation Control User Guide.
Configuring the Trash location in the software
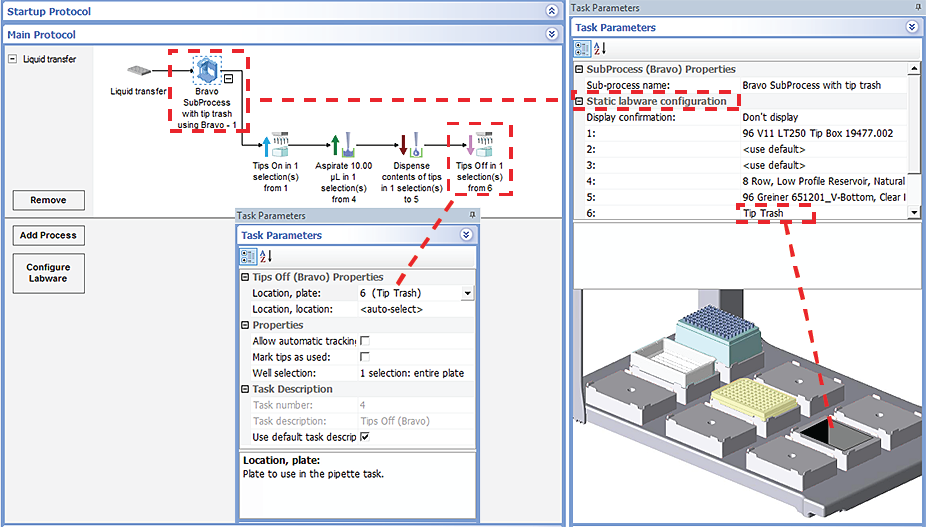
If you plan to use the accessory for a trash location only, no trash configuration is required in Bravo Diagnostics. Instead, you configure the accessory location as static labware in the protocol Bravo Subprocess. In the Configure Labware dialog box, ensure that you select a tip trash “labware” at the corresponding deck location. In the Bravo Subprocess, use the Tips Off task to eject the pipette tips at the Tip Trash Bin accessory. The following figure shows an example protocol. For more details, see the VWorks Automation Control User Guide.
Figure Example of VWorks protocol with static labware configuration for tip trash at deck location 6
 |
Related information
For information about... | See... |
|---|---|
Editing teachpoints | |
Using an accessory in a protocol | VWorks Automation Control User Guide |