Installing and configuring a platepad or Alignment Station
About this topic
This topic describes how to install and configure a standard platepad and the Alignment Station.
Descriptions
Standard platepad
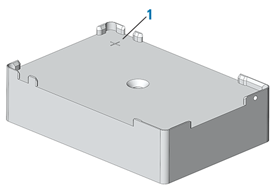
The standard platepad can accommodate any microplate-sized labware. The platepad has a crosshairs (1) in one corner, as the following figure shows, which is used when setting pipettor teachpoints.
 |
Alignment Station
An Alignment Station is a platepad that has three spring rollers on two of the sides. The spring rollers are designed to push a microplate into the opposing corner, securing the microplate position and ensuring precise pipetting. Like the other platepads, it contains a crosshairs (1) for setting pipettor teachpoints.
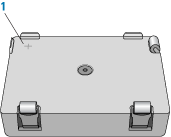 |
The Alignment Station can accommodate 1536-well microplates, small-transfer (ST) tip boxes, and any other microplate requiring precision location.
Before you start
Make sure you have the following:
• Alignment Station or platepad
• M5 hex wrench
• 1.5‑mm hex wrench
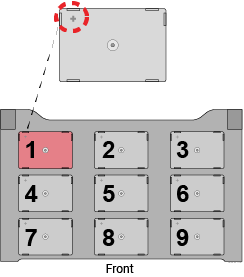
When installing the platepad or Alignment Station, ensure that you orient the crosshairs towards the northwest corner of the deck, as the following figure shows.
Figure Crosshairs orientation on the Bravo deck (top view)
 |
Installing a platepad or Alignment Station
To install a platepad or Alignment Station:
1 If a different platepad is already installed at the target installation location, remove it as follows:
a Uninstall the screw from the center of the platepad.
b Lift off the platepad ensuring that the dowel pins under the platepad remain in the deck.
2 Position the platepad or Alignment Station at the target deck location. Make sure the crosshairs are towards the northwest corner of the deck. Ensure that the platepad or Alignment Station sits level on the deck.
3 Install the supplied flathead cap screw into the center of the platepad or Alignment Station.
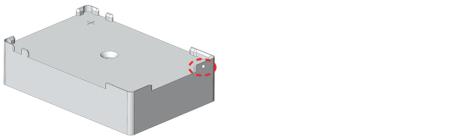
4 Ensure that the setscrews in the platepad tabs are recessed and not protruding into the plate nest. Use a 1.5‑mm hex wrench to back out any protruding setscrews.
Figure Setscrew in platepad tab
 |
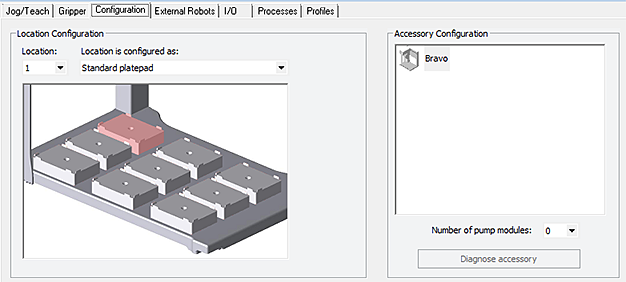
Configuring the deck location in the software
To configure the deck location in the software:
1 Initialize the profile in Bravo Diagnostics.
2 Click the Configuration tab, and verify that the deck location is configured as a Standard Platepad.
 |
3 Verify the teachpoint for this location. For instructions, see Setting teachpoints.
Related information
For information about... | See... |
|---|---|
Bravo Platform hardware components | |
Editing teachpoints |