Migrating files from VWorks v12.3–13.1x
Before you start
Ensure the following on the computer where you want to use the Migration Wizard:
• A previous version of the VWorks software (version 12.3, 13.0, or 13.1.x) was uninstalled.
• VWorks 14.0 or later is installed and configured.
• You are logged in as an Administrator.
Migration issues
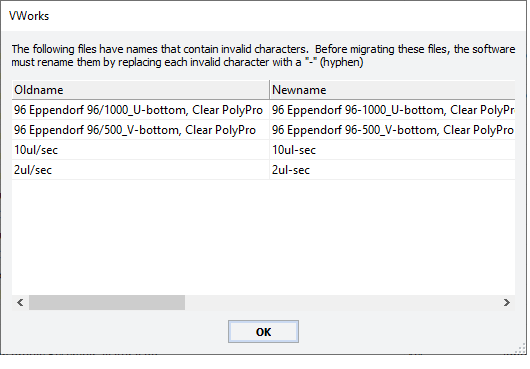
• After you select the files to be migrated, the wizard will display a message if any of the file names contain invalid characters. Before migrating these files, the software will rename them using a hyphen (-) to replace any invalid characters.
• The Migration Wizard does not migrate a record if any of its dependencies are missing. For example, a protocol cannot be migrated if the associated device file cannot be found. In this case, the wizard will display a list of any files that cannot be migrated and their missing dependent records.
Procedure
To migrate files from a previous VWorks version:
1 In the VWorks window, choose Tools > Migration. The Migration Wizard opens.
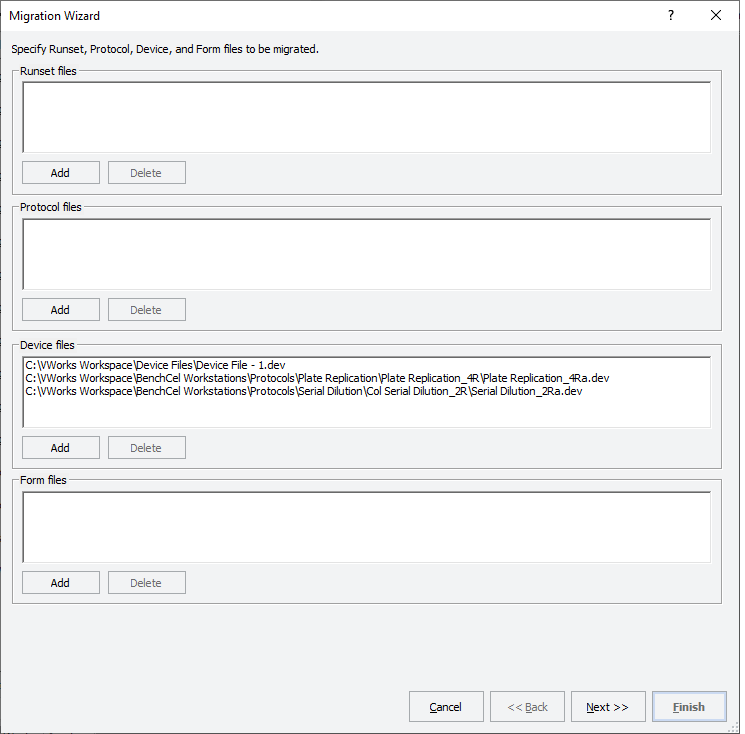 |
2 In the Specify Runset, Protocol, Device and Form file page:
Note: When you select the device files, the wizard automatically locates the runset, protocol, and form files associated with the selected device files and all the file dependencies, such as labware entries and liquid classes.
a To select the device files that you want to migrate, under Device files, click Add.
b In the Select Device Files dialog box, select the files you want to migrate and click Open.
Note: You can press SHIFT+click or CTRL+click to select multiple files.
c If you want to add files that are not associated with the selected device files, click Add for the given file type, and then select the files.
d Verify the list of files to be migrated, and then click Next.
3 In the Specify pipetting techniques, error library, macro library, VWorks Options and external files page, do the following:
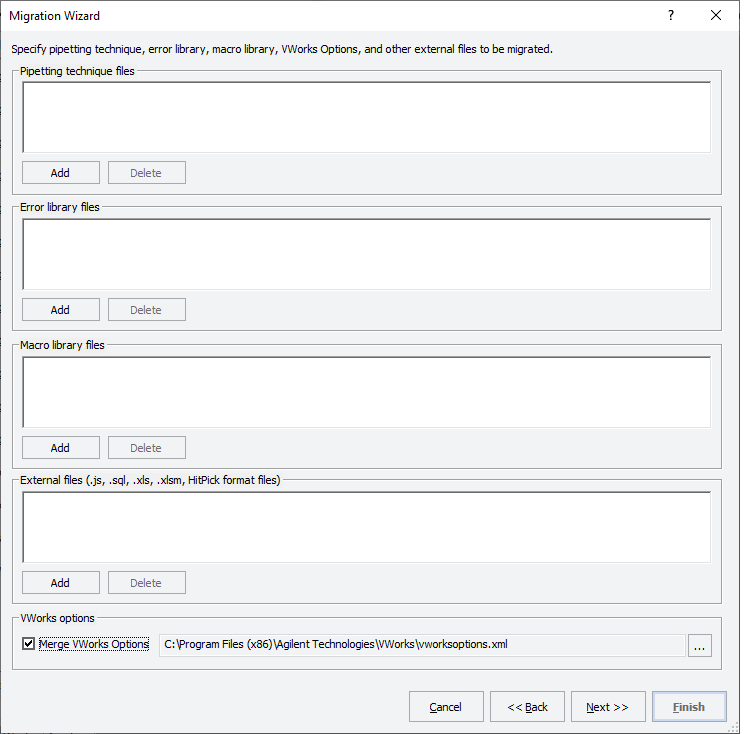 |
a Add any of these file types not already associated with the runsets, protocols, and forms that you added on the previous page.
Note: The wizard automatically locates the pipetting techniques, error library and macro library files, and external files associated with the runsets, protocols, and forms you added on the previous page.
b Under VWorks Options, select the check box if you want to merge the global options from the previous version.
Note: The global options are settings that apply to all protocols, such as error handling, view options, and so forth.
c Click Next. A list of all device profiles found in the registry appears.
4 To specify the profiles to be migrated, do one of the following:
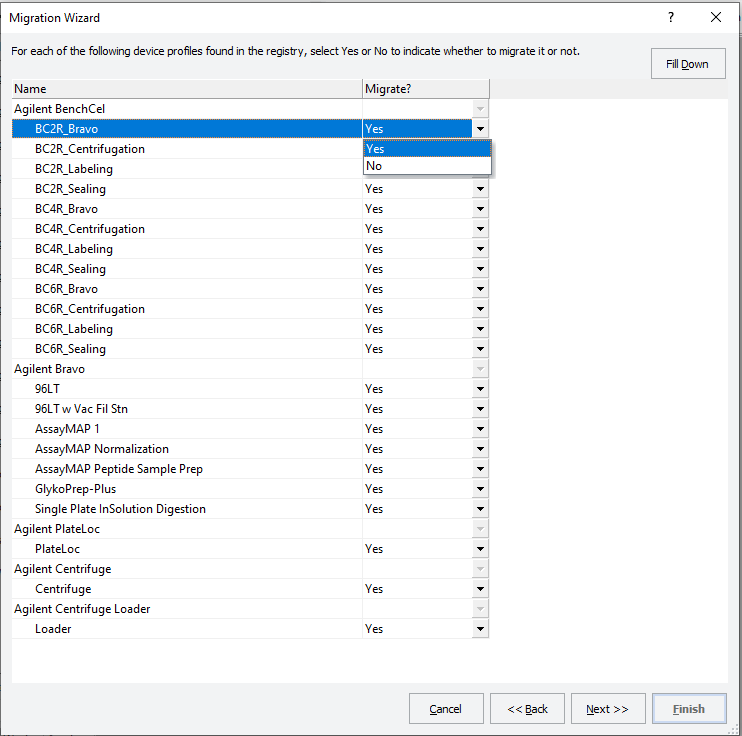 |
• If you want to migrate all the profiles, select Yes in the Migrate? column (default).
• If you want to migrate all but a few profiles:
In the Migrate? column, select Yes for the first row, and then click Fill Down. Select No for each profile that you do not want to migrate.
• If you want to migrate only a few of the profiles listed:
In the Migrate? column, select No for the first row, and then click Fill Down. Select Yes for each profile you want to migrate.
Click Next. A list of all the labware entries and Labware classes appears.
5 Specify the Labware Entries and Liquid Classes to be migrated:
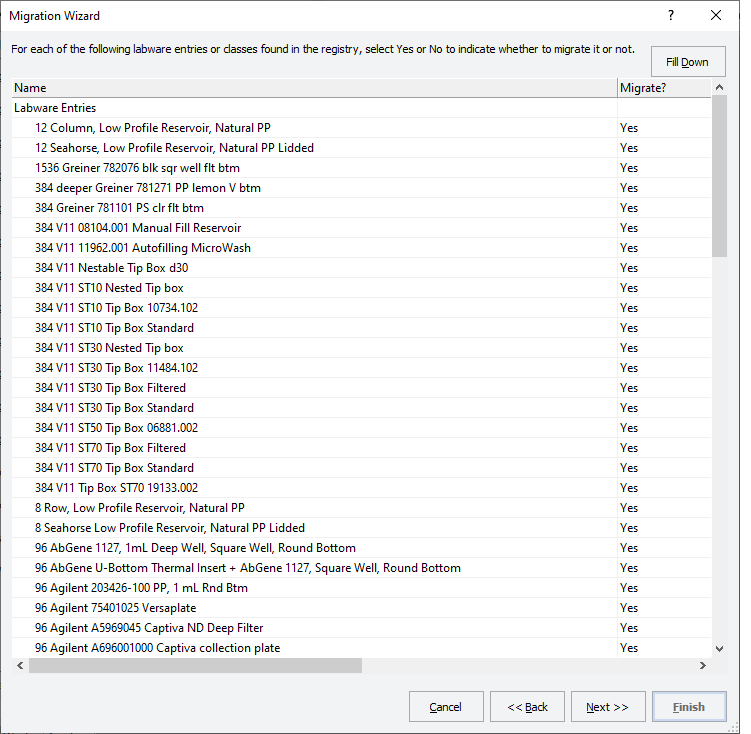 |
• If you want to migrate all the labware entries and labware classes, select Yes in the Migrate? column (default).
• If you want to migrate all but a few:
In the Migrate? column, select Yes for the first row, and then click Fill Down. Select No for each labware entry and labware class you do not want to migrate.
• If you want to migrate only a few labware entries and labware classes:
In the Migrate? column, select No for the first row, and then click Fill Down. Select Yes for each labware entry and labware class you want to migrate.
Click Next. A list of all the liquid classes appears.
6 Specify the liquid classes to be migrated:
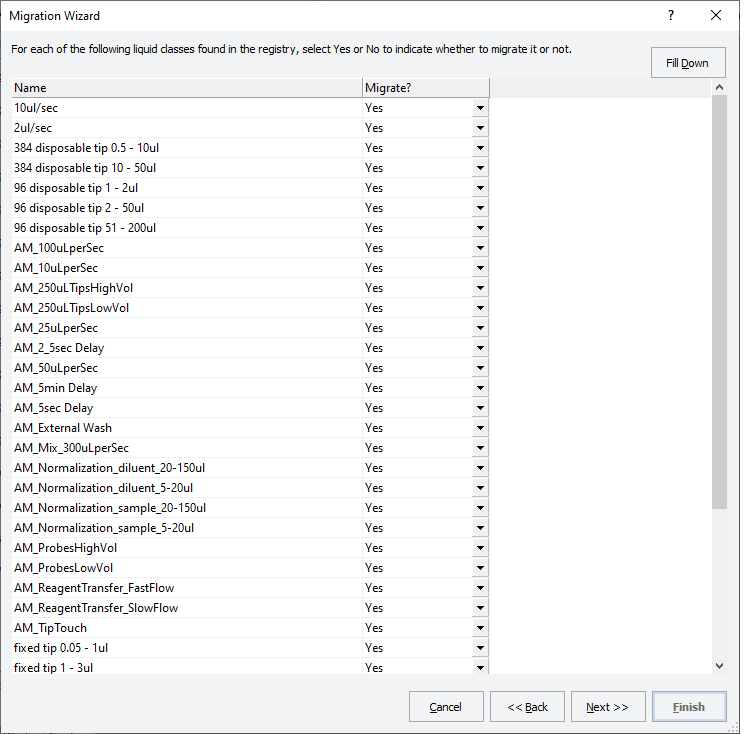 |
• If you want to migrate all the liquid classes, select Yes in the Migrate? column (default).
• If you want to migrate all but a few:
In the Migrate? column, select Yes for the first row, and then click Fill Down. Select No for each liquid class you do not want to migrate.
• If you want to migrate only a few liquid classes:
In the Migrate? column, select No for the first row, and then click Fill Down. Select Yes for each liquid class you want to migrate.
Click Next.
7 In the Specify the name of the folder page, type the name of the root folder where the migrated files will be stored.
Note: The folder will be created under /VWorks Projects/VWorks/. By default, the name of the folder is General.
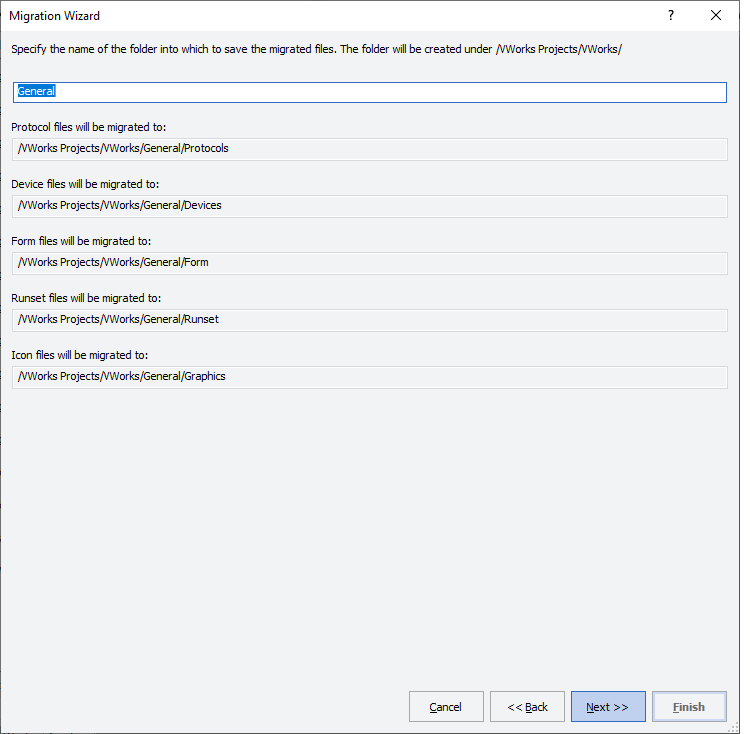 |
Click Next
If the wizard cannot locate a record’s dependencies, a Records not found message lists the records that cannot be migrated and their missing dependent records.
If any of the file names contain invalid characters, the software displays a message listing which files will be renamed, using a hyphen (-) to replace any invalid characters.
 |
8 In the page that lists the records to be migrated, review the list to see if any files have a Yes in the Already on OLSS column.
A Yes appears for any record if the same file name already exists in the Shared Services (OLSS) database.
For each Yes, select the corresponding Action from the list:
• Ignore (default). Does not migrate the current record.
• Overwrite. Overwrites the existing record with the one you are migrating.
• Append. Migrates the record with the current date appended to the file name.
• Merge. Available for labware classes and the vworksoptions.xml file.
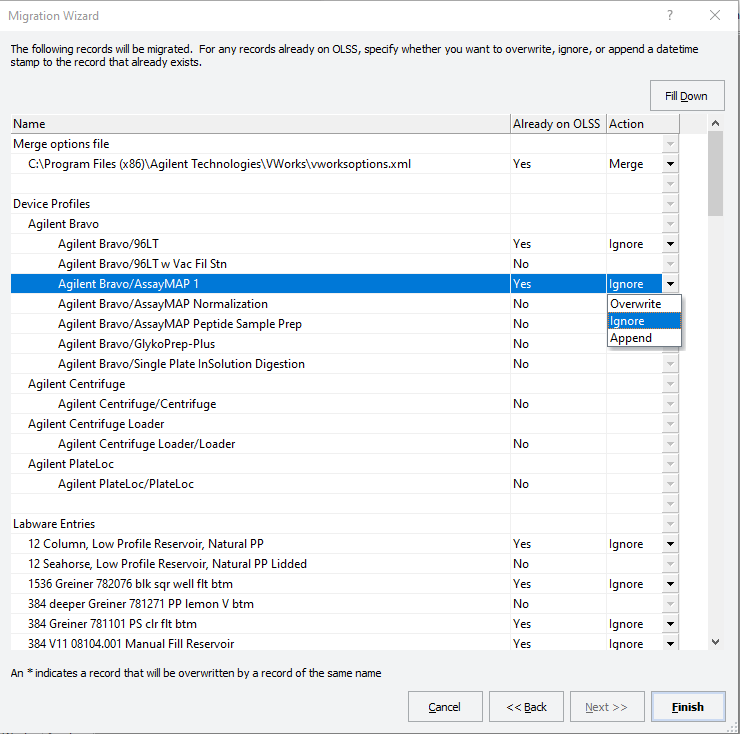 |
Click Finish.
9 VWorks Plus. If an audit trail is being logged, the Audit Comment dialog box opens. Select or type the audit comment, and then click OK.
10 A message opens and states that VWorks must be restarted to load the migrated files. Click OK, and then restart the VWorks software.
 |
Related information
For information about... | See... |
|---|---|
Preparing for migration | |
Exporting and importing protocols files | |
Backing up and restoring | |
Setting up the VWorks software |