Creating plate group with barcode input file
About this topic
This topic describes how to use a barcode input file to create a plate group. This is the most efficient way to create a plate group if you previously used a barcode input file to label a collection of labware that are now stored in a storage device.
Who should read this
Read this topic if your lab automation system has a random-access storage device, such as the Labware MiniHub.
Barcode input files
The barcode input file must be a text file, created in Notepad or equivalent editor, and have the .csv or .bar file name extension.
The input file can be stored anywhere on the computer that runs the VWorks software. However, if you want to store the barcode input file in Shared Services storage, make sure that you import the file using the File > Import Misc File command.
File requirements for .csv files
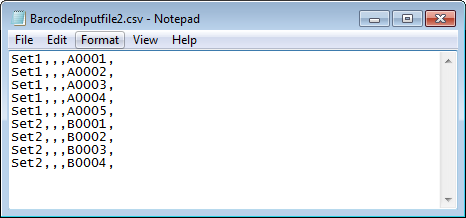
• The file may contain any number of columns, but only the first 5 columns are significant.
• The first column file indicates the barcode group name.
• The second, third, fourth, and fifth columns indicate the north, south, west, and east barcode, respectively.
In the following example, Set1 and Set2 are the group names. Plates A0001 through A0005 in the Set1 group, and plates B0001 to B0004 are in the Set2 group. All barcodes are on the west side in this example.
 |
File requirements for .bar files
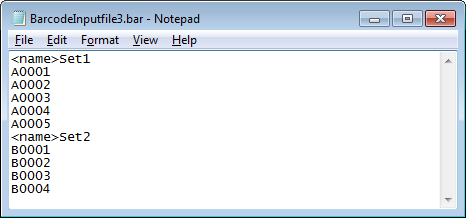
• The file must contain only one column. The column can contain as many groups of plates as desired.
• The first row in each plate group must contain the string, <name>, followed by the group name.
In the following example, Set1 and Set2 are the group names. All barcodes are on the west side of the plate. Plates A0001 through A0005 are in the Set1 group, and plates B0001 to B0004 are in the Set2 group.
 |
Procedure
To create a plate group with a barcode input file:
1 In the Inventory Editor window, click the Plate Groups tab.
2 In the Bar Code File Input area, click the  button, and then click one of the following options:
• Browse local storage. The Open dialog box opens. Locate and select the .csv or .bar file in the local file system, and then click Open.
• Browse Shared Services storage. The Open File dialog box opens. Locate and select the .csv or .bar file in the Shared Services Repository, and then click Open.
The file path of the selected file appears in the Bar Code File Input area.
 |
3 From the Available bar code groups list, select the group that you want to use. If you do not see the desired group name, check the input file. See Barcode input files.
If you are using the input file in the following example, you should see Set1 and Set2 in the Available bar code groups list.
|
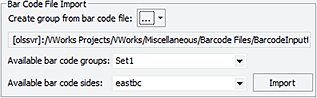 |
4 In the Available bar code sides list, select which of the plate’s four barcodes is going to be matched with a barcode read from the imported file.
If the imported file is a .csv file, this list also specifies which column in the .csv file to use when matching the existing plate’s barcode:
• northbc means match to column 2
• southbc means match to column 3
• westbc means match to column 4
• eastbc means match to column 5
The software ignores the other three barcode columns in the .csv file.
5 Click Import.
The labware labeled with the barcodes listed in the series will be used to create a plate group.
6 In the Inventory Management tab, specify a labware type for each labware.
Related information
For information about... | See... |
|---|---|
Software inventory | |
Opening the Inventory Editor | |
Using the labware selection list |