Disabling and enabling a device in the device file
When to temporarily disable a device
You might want to temporarily disable a device when:
• Running a protocol using a subset of devices
• Running protocols that use different pipette heads or deck setups
• Performing maintenance on a pooled or non-pooled device
The disabled device will be not be available during a protocol run. If the software encounters a task pointing to the disabled device during a run, the protocol will skip the task and continue the run. If the disabled device is part of a pool of devices and the other devices in the pool are available, the task will be executed using the available device.
Note: Up to 10 devices in a single device file can be disabled.
To disable a task without disabling the device, see Disabling and enabling tasks for more information.
When to enable a device
You might want to enable a device when:
• You are running a protocol that uses a device that was disabled for another protocol
• You have finished performing maintenance on a device
Before you start
Before you enable a device, make sure that you have set the teachpoints for the device. For more information see Adding devices and the user guide for the specific device.
Procedure
To disable a device in a device file:
1 In the VWorks window, click File > Open >Device.
2 In the Open File dialog box, select the device file (*.dev), and then click Open.
The device pane appears in the VWorks window and displays the list of devices.
3 Select the device in the Devices area and then select the Disable check box under the device properties area, or right-click the device and select Disable device.. In the Device area,  appears on the device icon, and (Disabled) is appended to the device name.
appears on the device icon, and (Disabled) is appended to the device name.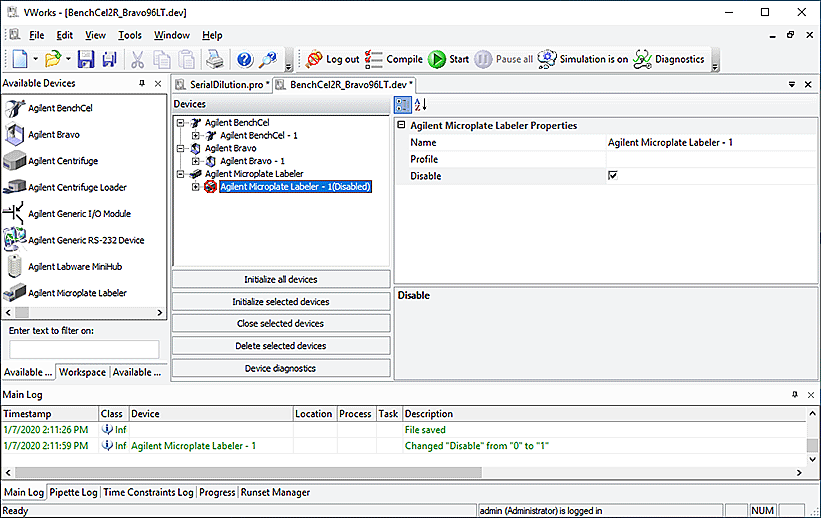 |
To enable a device in a device file:
1 In the VWorks window, click File > Open >Device.
2 In the Open File dialog box, select the device file (*.dev), and then click Open.
The device pane appears in the VWorks window and displays the list of devices.
3 Clear the Disable check box under the device properties area. Alternatively, right-click the device name and select Enable device.
In the Devices area, the icon disappears from the device and the name is no longer appended with the (Disabled) status.
icon disappears from the device and the name is no longer appended with the (Disabled) status. Example situations for disabling a device
Running protocols that use different pipette heads or deck setups
For example, you might want to run two protocols that use a Bravo Platform but each one requires a different pipette head. One protocol uses 96-well microplates and the other 384-well microplates. Instead of having two device files, each with a unique Bravo Platform profile for a specific head, you can create one device file in which you add two Bravo Platform devices, each with a unique profile and setup. When running one of the protocols, the Bravo Platform device with the configuration that is not in use is disabled.
1 In the VWorks window, click File > Open >Device.
2 In the Open File dialog box, select the device file that is associated with one of the protocols that use the Bravo Platform, and then click Open.
3 Add a second Bravo Platform and configure it to use the second profile and setup. See Adding devices for instructions.
4 Open the protocol you want to run. In this example, it is the one that uses 96-well microplates (Bravo 96LT profile).
5 Disable the Bravo Platform device with the profile (Bravo 384ST) that is not used in the protocol. See To disable a device in a device file: for instructions.
Note: The disabled Bravo device will be removed from the available device list.
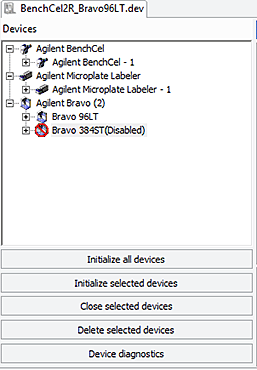 |
6 In the protocol, ensure the Bravo subprocess is associated with the correct Bravo device. See SubProcess (Agilent Bravo) for instructions.
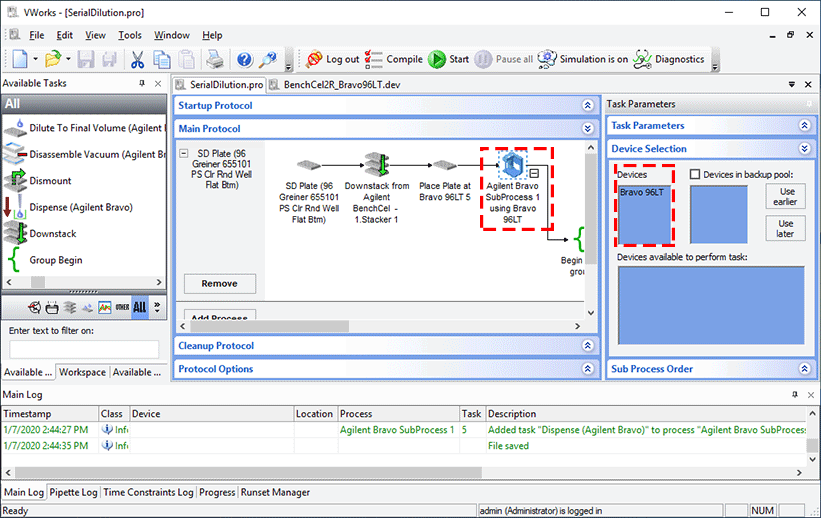 |
7 When you are ready to run the protocol, click Start. A disabled device message appears and asks you to confirm that you want to skip the disabled tasks.
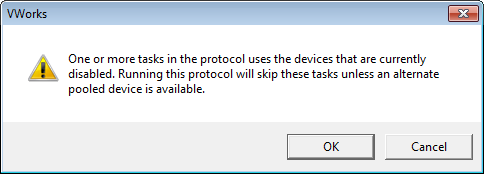 |
8 Click OK to run the protocol. The Run Configuration Wizard opens. Follow the instructions in the wizard. For details on the wizard, see Starting the protocol run.
Performing maintenance on a non-pooled device
While replacing a roll of seal on a PlateLoc Sealer, you want to continue to perform tasks on the other devices.
1 Open the protocol you want to run.
2 Open the device file associated with the protocol.
3 Disable the PlateLoc Sealer associated with the protocol. See To disable a device in a device file: for instructions.
4 When you are ready to run the protocol, click Start. A disabled device message appears and asks you to confirm that you want to skip the disabled tasks.
 |
5 Click OK to confirm that the tasks should be skipped. A second message appears and asks you to confirm the number of tasks to be skipped. In the following example, one task is skipped.
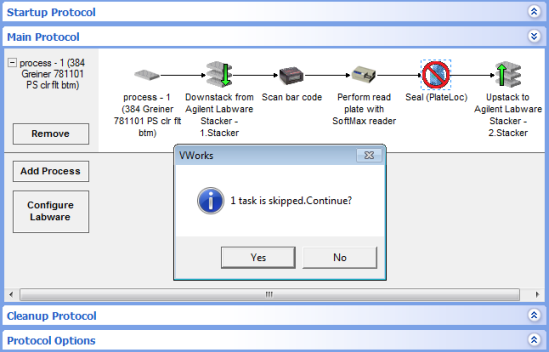 |
6 Click Yes to confirm the number. The Run Configuration Wizard opens. Follow the instructions in the wizard. For details on the wizard, see Starting the protocol run. During the run, the tasks associated with the disabled device are skipped. In the preceding example, the Seal task is skipped because the PlateLoc Sealer device is disabled.
Performing maintenance on a pooled device
While performing maintenance on a PlateLoc Sealer that is a member of a pool of PlateLoc Sealers, you want to continue to run a protocol using the other devices.
1 Open the protocol you want to run.
2 Open the device file associated with the protocol.
3 Disable the PlateLoc Sealer you want to service. See To disable a device in a device file: for instructions.
Note: If the disabled PlateLoc Sealer device was associated with a Seal task, the log contains a warning indicating that because no device is assigned to the Seal task, the task will be skipped during the protocol run.
4 Reassign another PlateLoc Sealer from the device pool to the Seal task and verify that the task parameters are correct.
Note: If another PlateLoc Sealer was placed in the backup pool, the software automatically moves the backup device to the Devices involved in this task area and you will not have to reassign another device.
5 Run the protocol. The software uses the alternate available device.
Note: If you do not reassign another device to the affected task, a message appears when you compile or run the protocol and allows you to skip the task.
Related information
For information about... | See... |
|---|---|
VWorks software components | |
Adding a device | |
Preparing devices for a run | Device user guide |
Creating protocols | |
Starting a protocol | |
Add a SubProcess | |
Adding a task | |
Simulating a run | |
Running a protocol |