Creating and managing plate groups
About this topic
This topic describes how to create a plate group, which is a list of specific labware that can be moved into or out of a labware storage device without regard for which slots they are stored in.
Read this topic if your lab automation system has a random-access storage device, such as the Labware MiniHub.
For instructions on how to add labware into the database, see Adding labware information in the inventory database.
Procedure
To create a plate group:
1 In the VWorks window, select Tools < Inventory Editor.
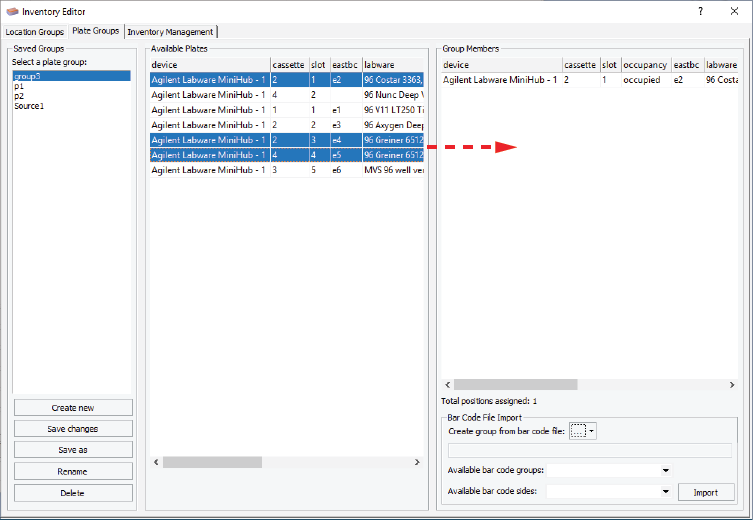
2 In the Inventory Editor window, click the Plate Groups tab.
3 Click Create new, type a name for the group, and click OK.
 |
To add labware to the plate group:
1 In the Available Plates area, select a group of available labware, and drag the selection into the Group Members area.
You can use CTRL+click or SHIFT+click to select more than one labware. Alternatively, you can double-click a plate to add it to the plate group.
 |
Note: To delete a plate from the plate group, select the plate in the Group Members area, and then press DELETE.
2 Click Save Changes.
3 Close the Inventory Editor window.
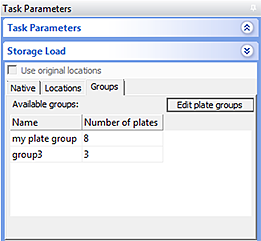
The plate group is listed as a available groups in the Groups tab in the Load/Unload Task Parameters area.
 |
Changing the processing order
You can change the order in which the labware in a plate group will be processed.
To change the processing order:
1 In the plate group list, select a labware.
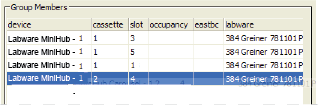 |
2 Drag it to another position in the list.
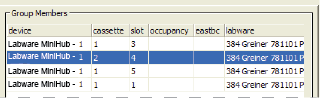 |
Deleting a plate group
To delete a plate group from the inventory:
1 In the Inventory Editor window, click the Plate Groups tab.
2 In the Saved Groups area, select the plate group.
3 Click Delete.
Related information
For information about... | See... |
|---|---|
Creating a location group | |
Opening the Inventory Editor | |
Moving labware in and out of a storage device | |
Incubating labware | |
Using barcode input files | |
Using storage tasks in a protocol |